Using
the Global Channel Search Script to Integrate with Dispatcharr and
Emby for Full Guide Data
Dispatcharr
Information https://github.com/Dispatcharr/Dispatcharr
First
Download the script with the instructions at
https://github.com/jesmannstl/global-channel-search
or if using the docker version
https://hub.docker.com/r/jesmann/global-channel-search
Launch
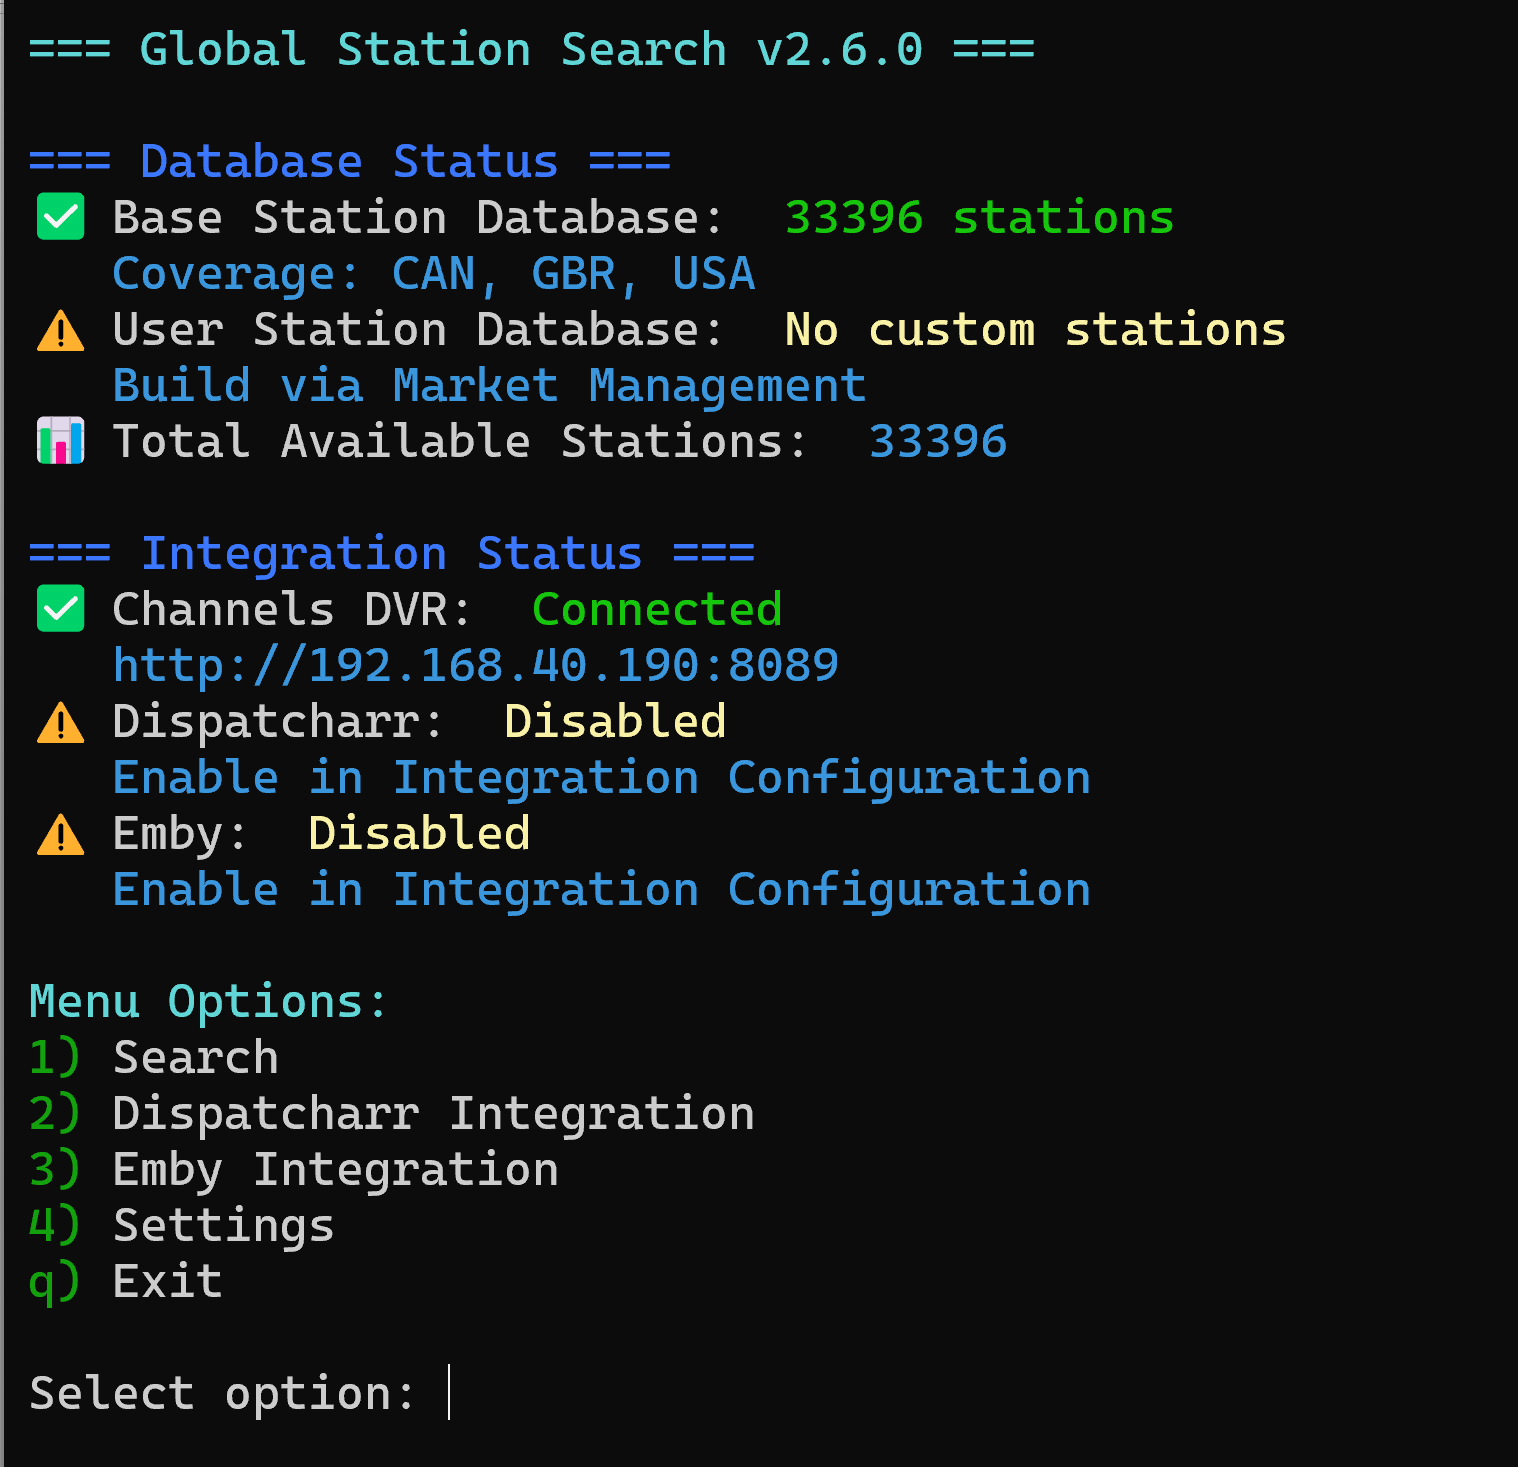
the script and the first time setup will begin:

Channels
DVR server is not required as the base cache included has virtually
all United States, Canada and United Kingdom stations built in but if
you need other countries (See Available Countries at end) and have a
Channels DVR server you can add the IP and Port on this setup by
pressing y or bypass by pressing n and hit Enter.
Main
Menu:
First
time setup:
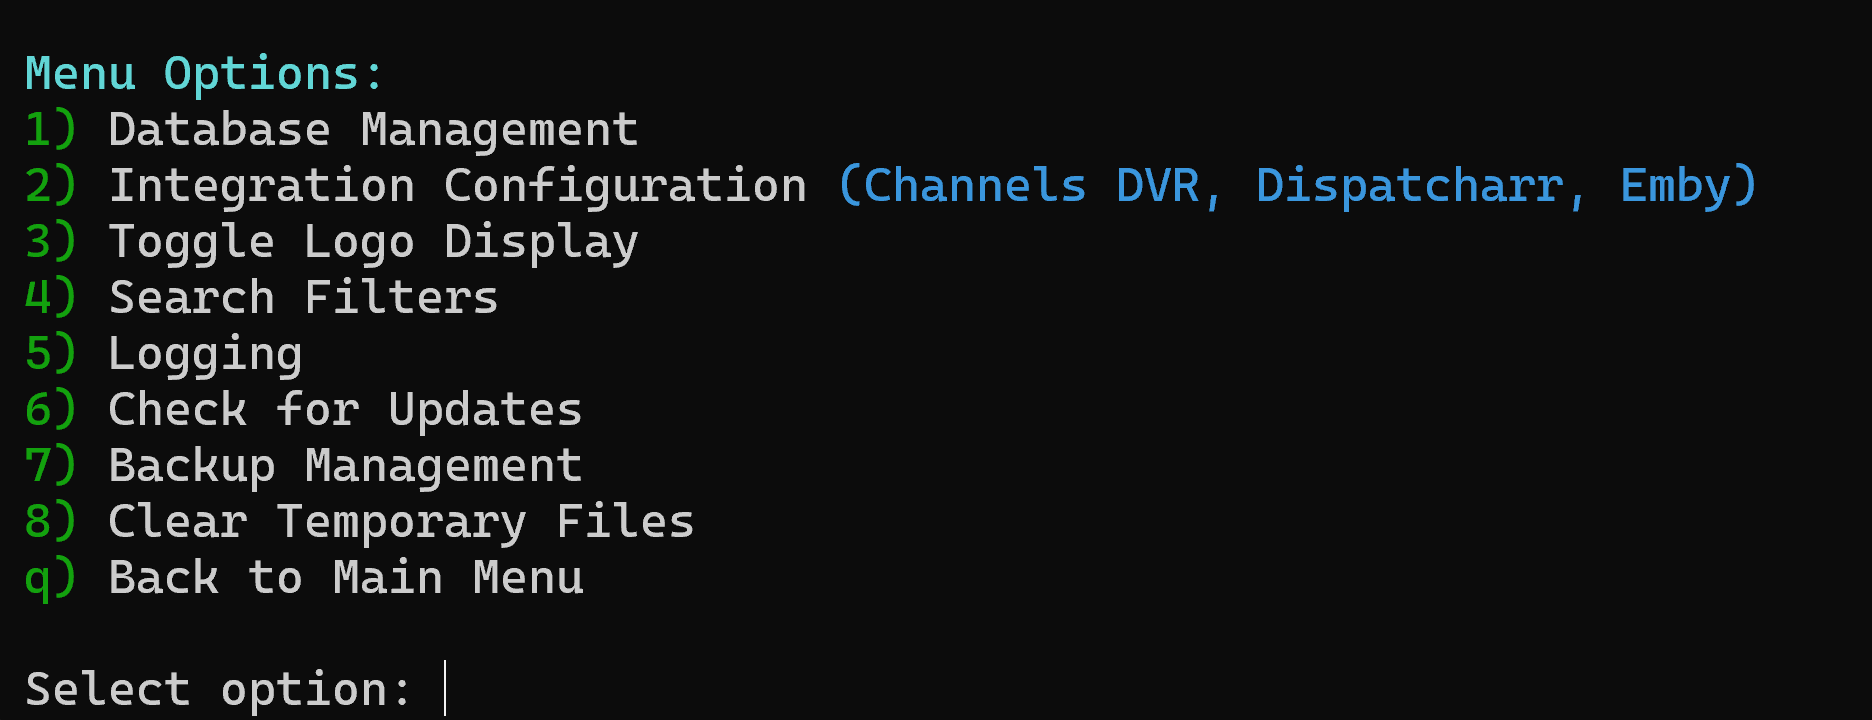
Choose
option “4) Settings” by pressing 4 then ENTER
Settings
Menu:
Setup
Dispatcharr and Emby Integration:
From
the Settings menu press “2) Integration Configuration” and ENTER
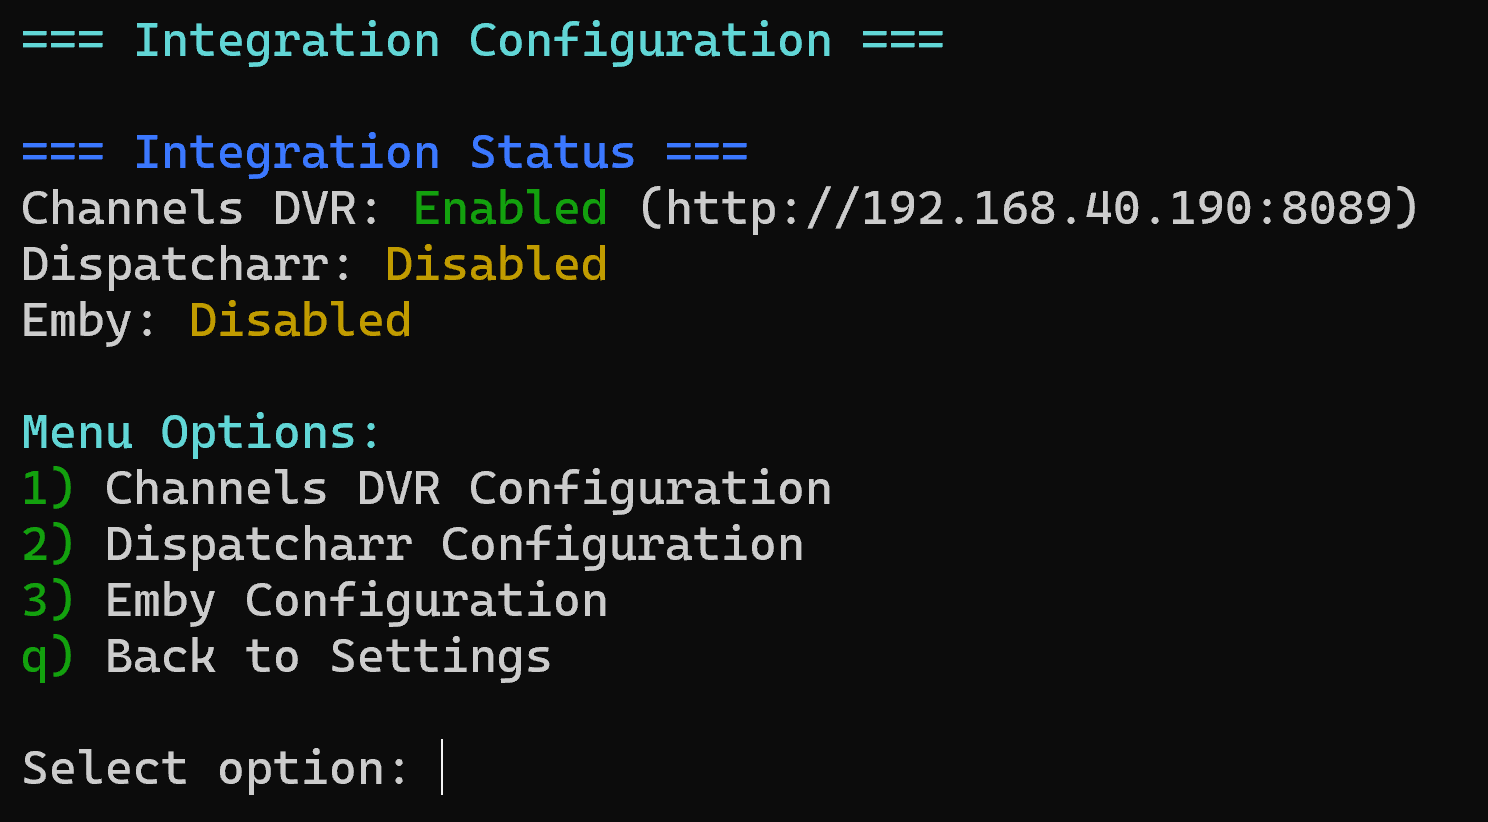
Now
at the Integration Menu you can choose “1) Channels DVR
Configuration” to setup or change those settings if you had not
previously. “2) Dispatcharr Configuration” to link to Dispatcharr
to add Gracenote ID to your Dispatcharr Channels as well as update
Channel Name, tvg-id to standard Guide Call Sign and logo if so
desired. “3) Emby Integration” to add lineup ID’s to Emby
automatically with the Gracenote IDs listed.
Dispatcharr
Configuration
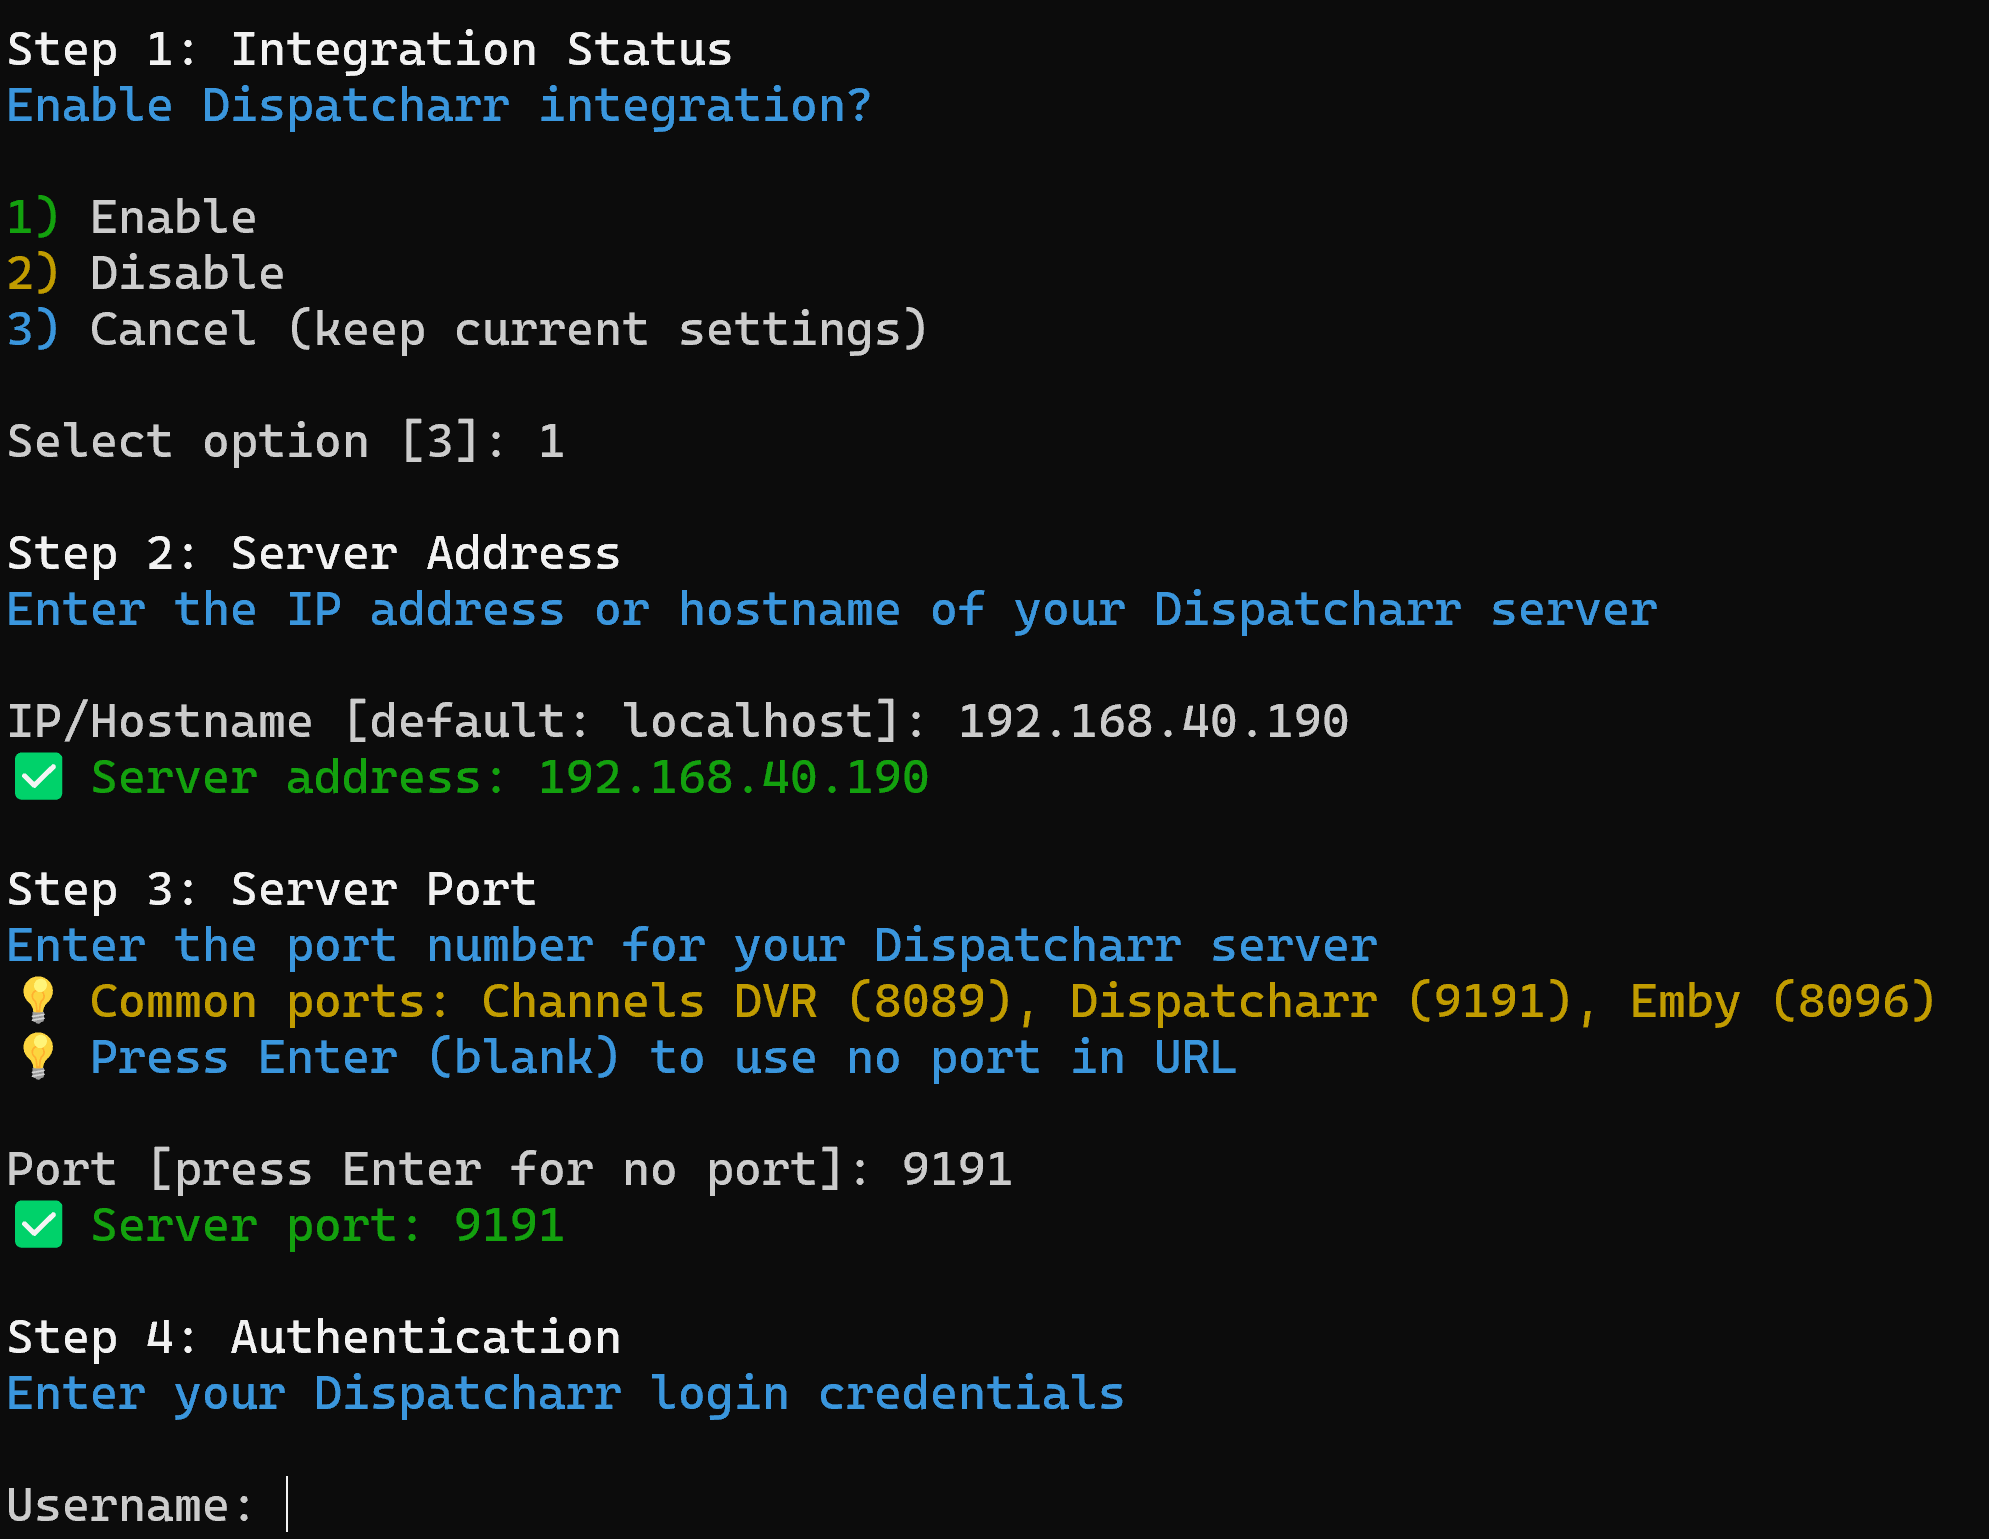
From
the Integration Configuration Menu press 2 for Dispatcharr
Configuration and press Enter to go to the Dispatcharr Integration
Setup
Step
1 Choose 1 then ENTER to Enable Integration
Step
2 Enter your IP Address to where your Dispatcharr is located
Step
3 Enter your Port for Dispatcharr (Default is 9191)
Step
4 Enter your Dispatcharr admin username then password
Step
5 Press y and ENTER to Save and Test the connection
Once
successful press ENTER to go back to the Integration Configuration
Menu
Emby
Configuration
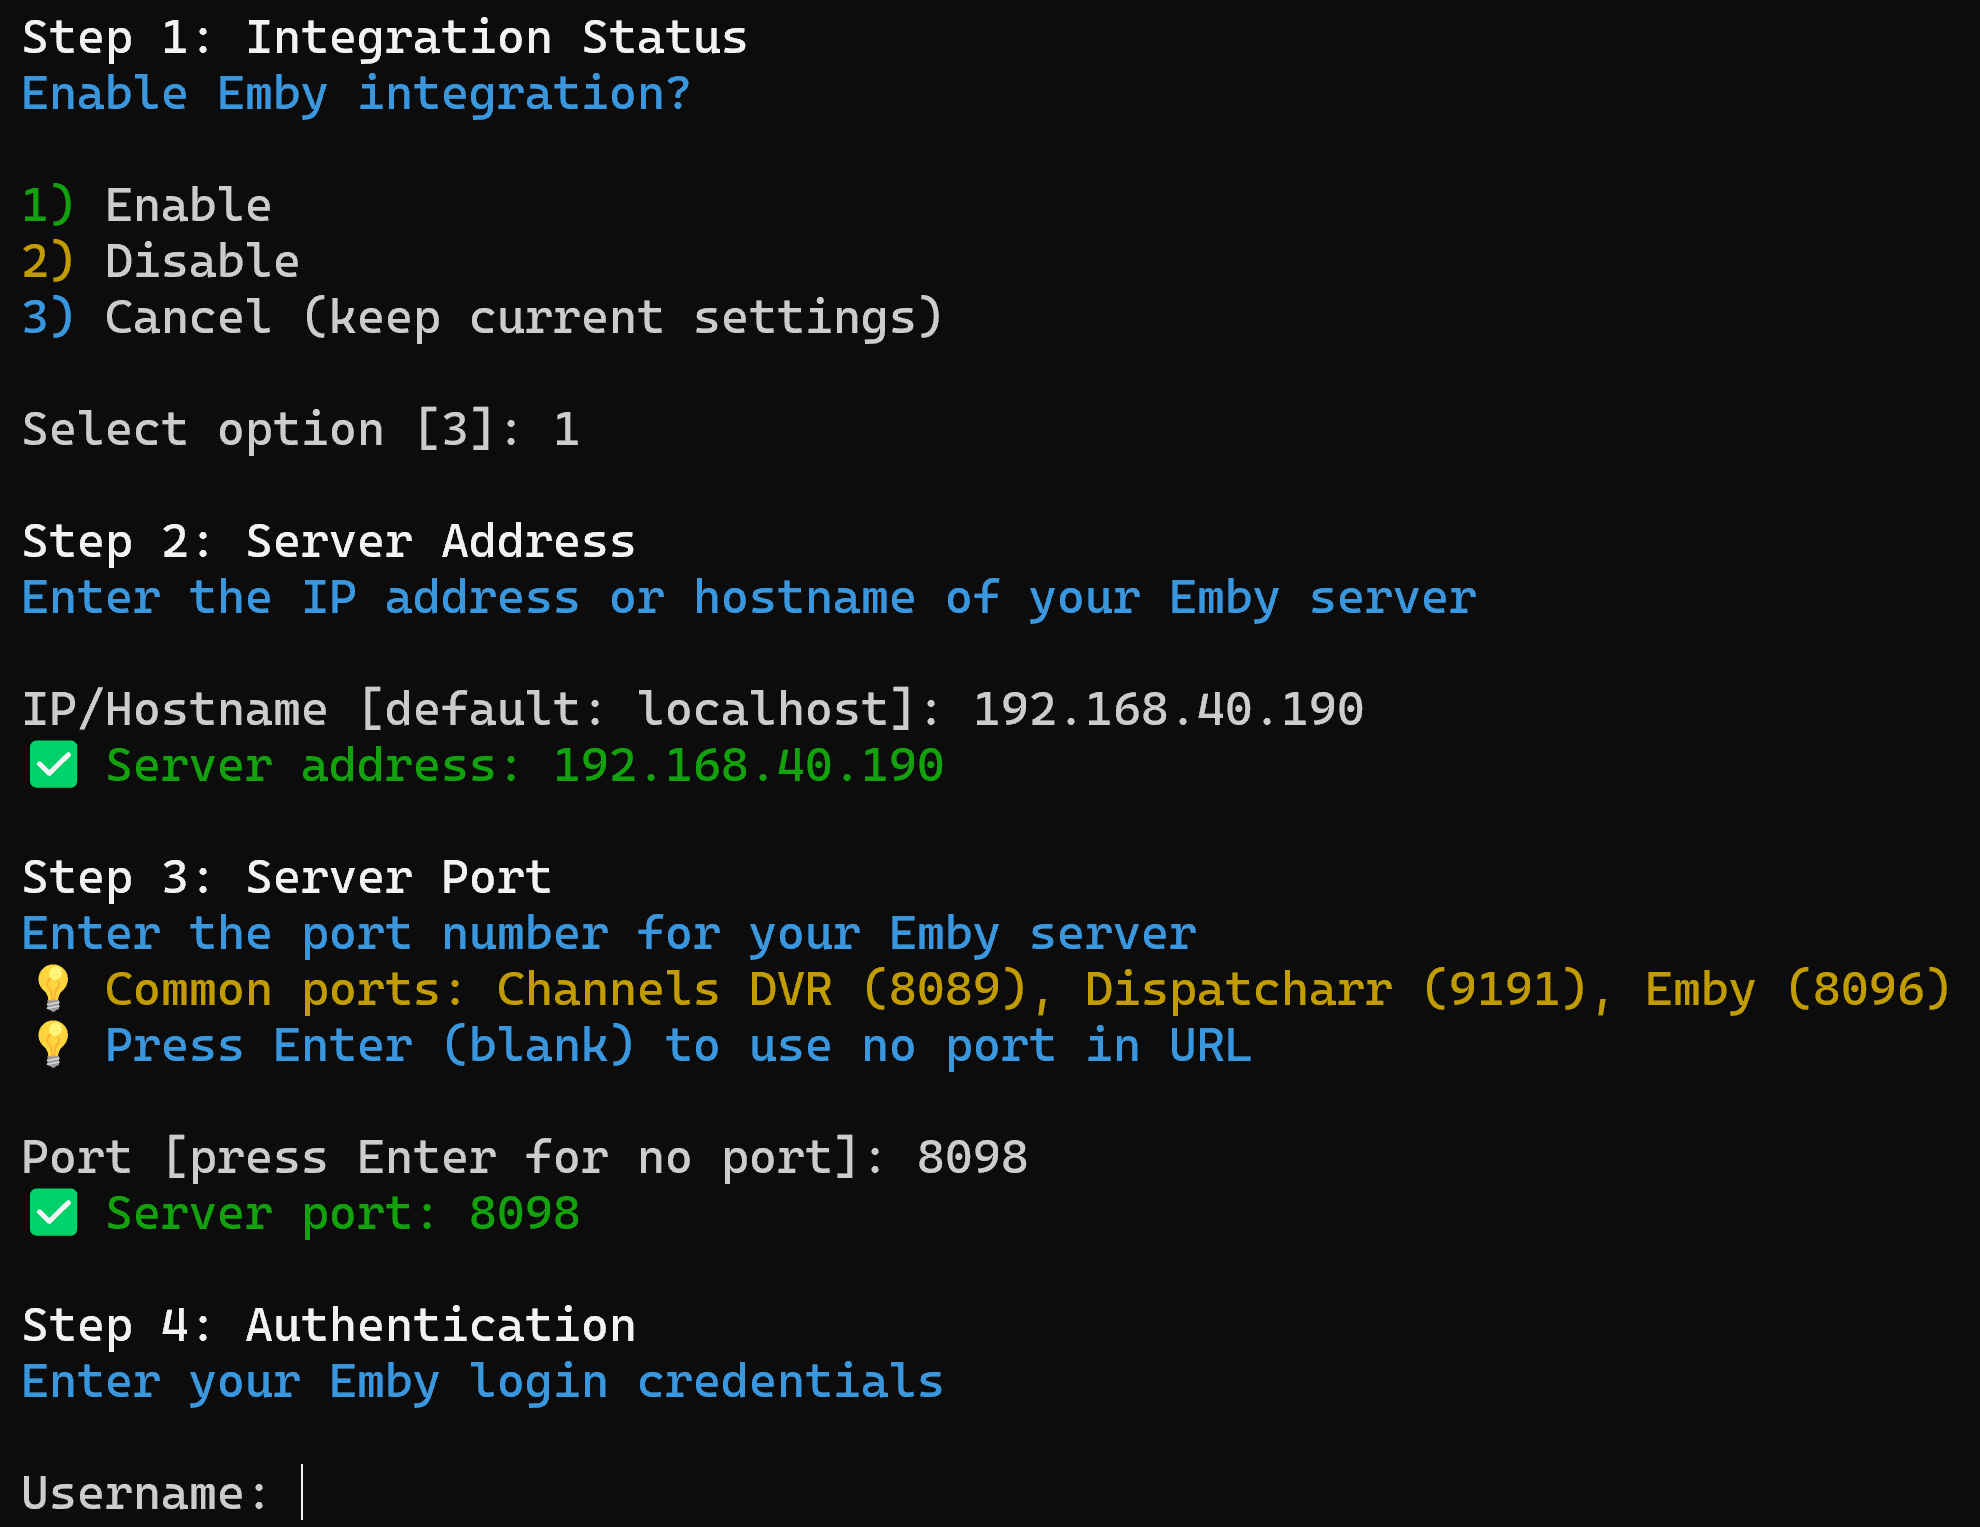
From
the Integration Configuration Menu press 3 for Emby Configuration and
press Enter to go to the Emby Integration Setup
Step
1 Choose 1 then ENTER to Enable Integration
Step
2 Enter your IP Address to where your Emby Server is located
Step
3 Enter your Port for Emby Server (Default is 8096)
Step
4 Enter your Emby username then password
Step
5 Press y and ENTER to Save and Test the connection
Once
successful press ENTER to go back to the Integration Configuration
Menu
Now
that Integration is setup from the Integration Configuration Menu
choose “q) Back to Settings” to go back to the Settings Menu then
from the Settings Menu choose “q) Back to the Main Menu” to go
back to the Main Menu
Using
Dispatcharr Integration
From
the Main Menu choose “2) Dispatcharr Integration” and press ENTER
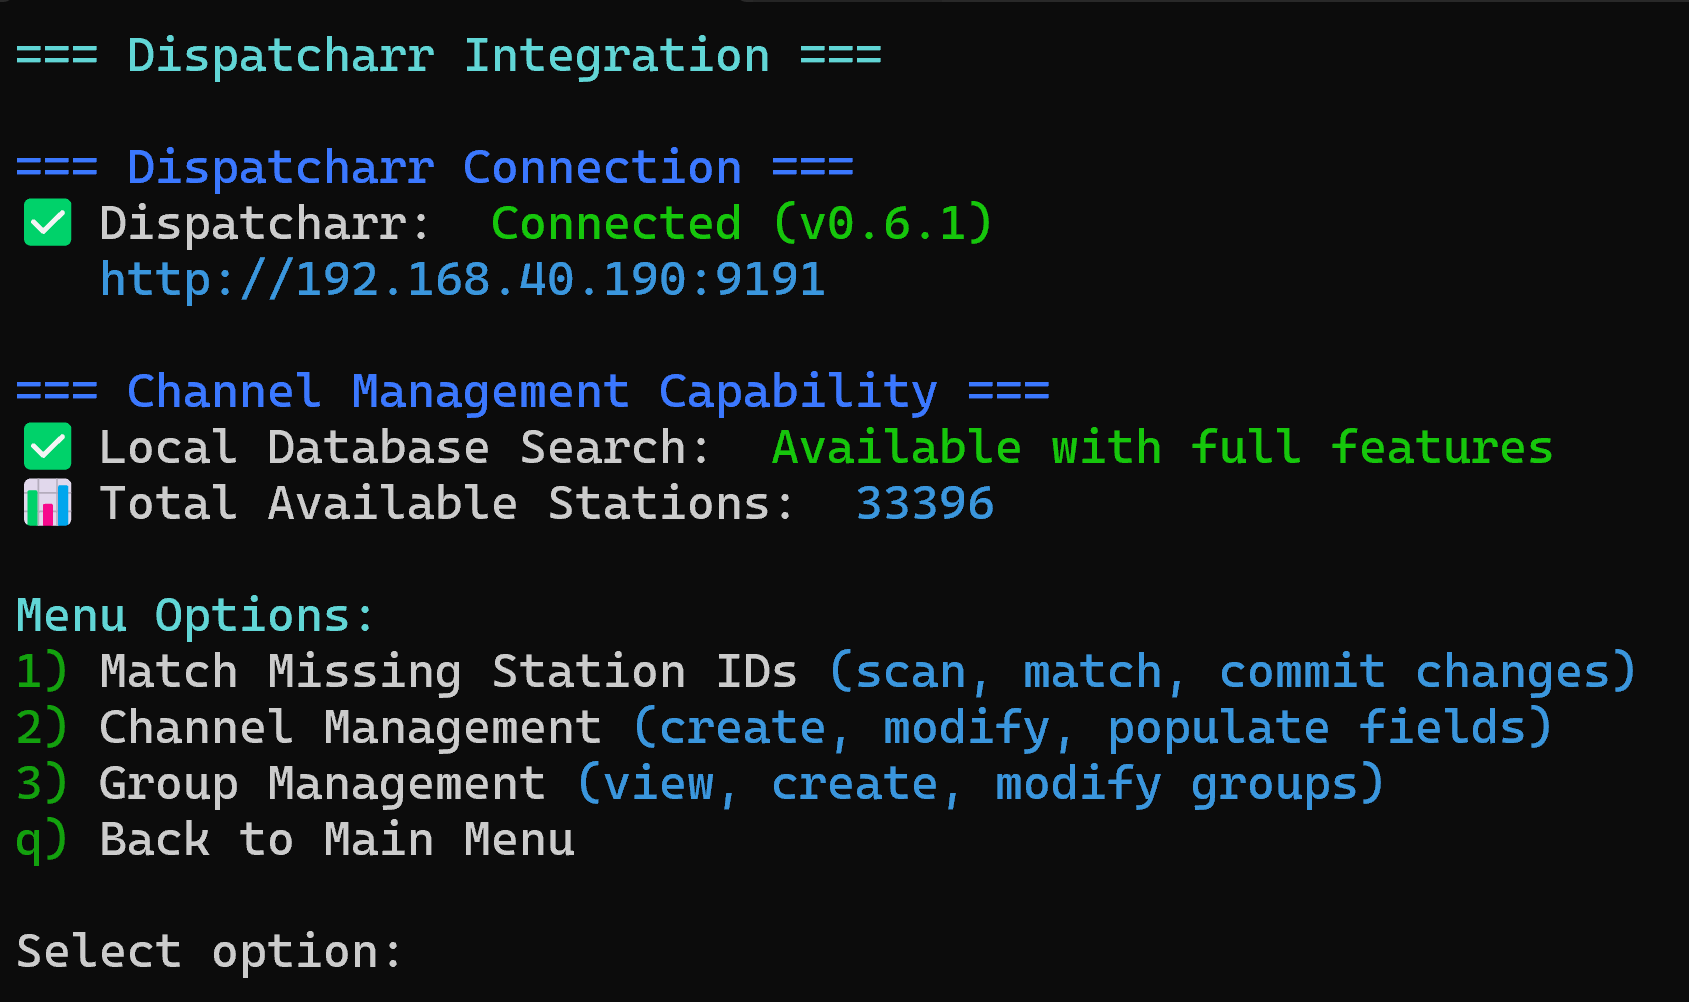
If
you just want to go through your Channels in Dispatcharr to ONLY add
the Gracenote ID (aka Station ID) choose option “1) Match Missing
Station IDs”
If
you want to update channels (or even create new channels to add
streams to) changing the Name, adding or changing tvg-id (also known
as Call Sign), Gracenote ID and/or updating logo choose option “2)
Channel Management”
If
you want to change groups in Dispatcharr choose option “3) Group
Management”
Channel
Management
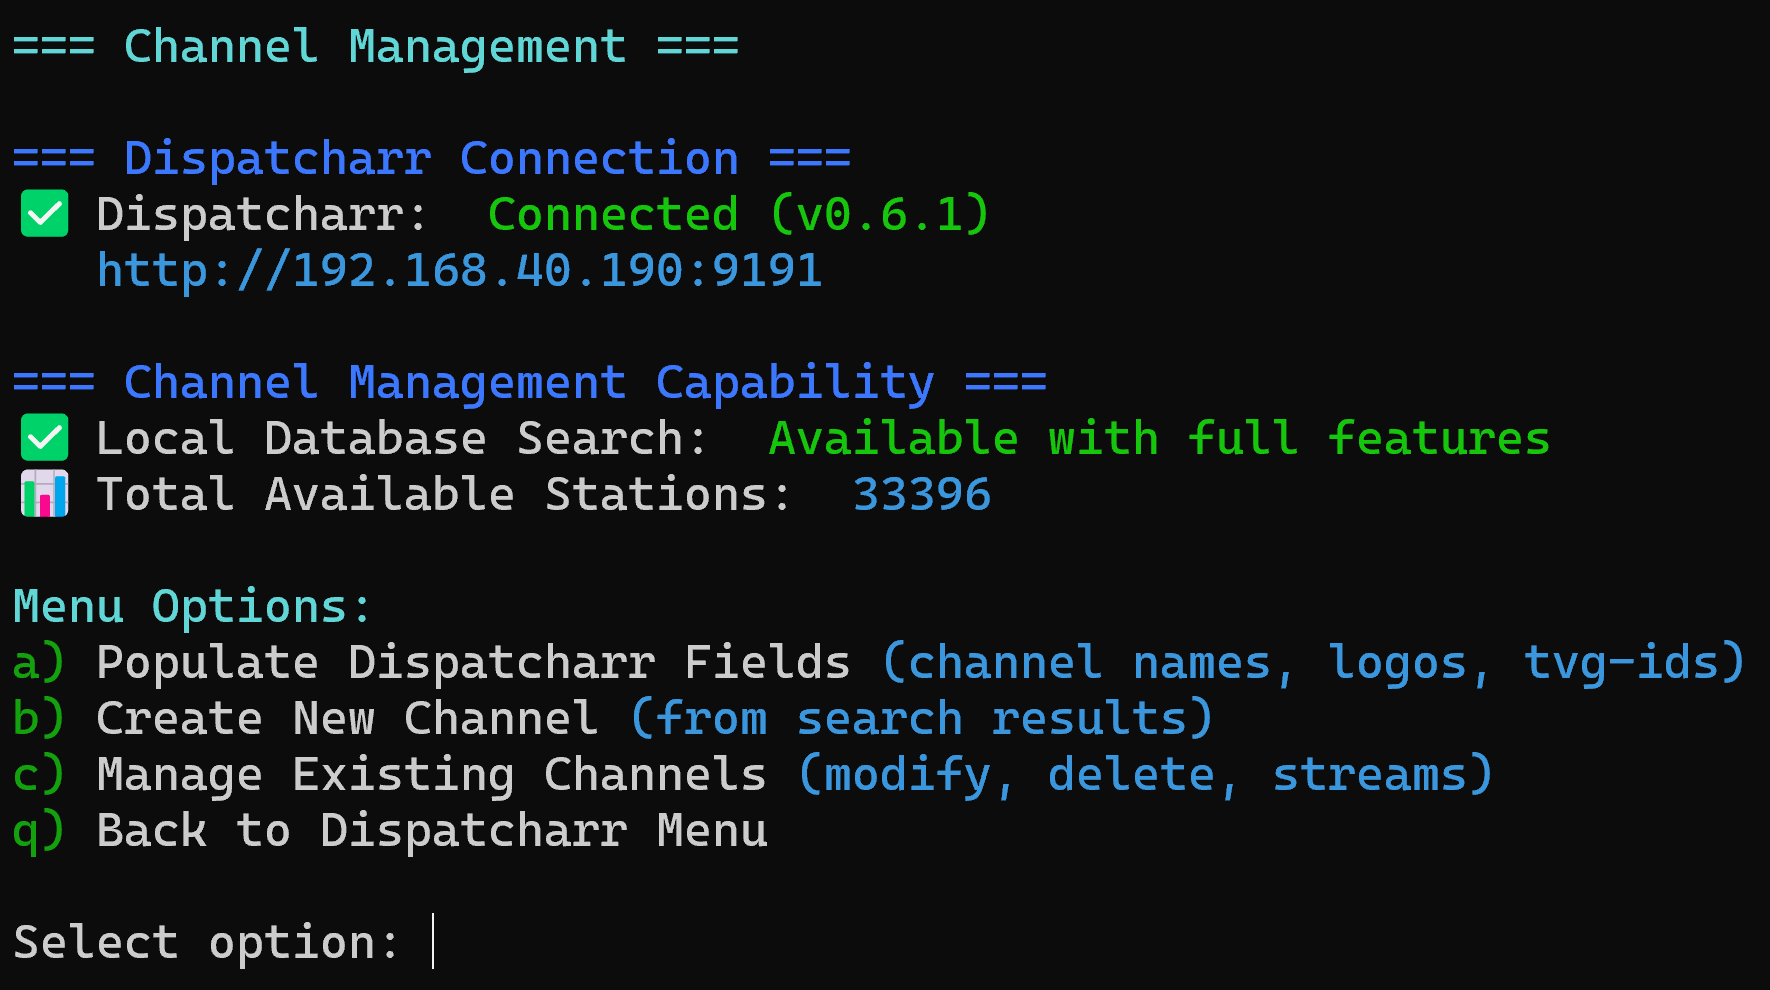
This
is what I consider the easiest setup to choose option “a) Populate
Dispatcharr Fields” and press ENTER to bring up this Menu
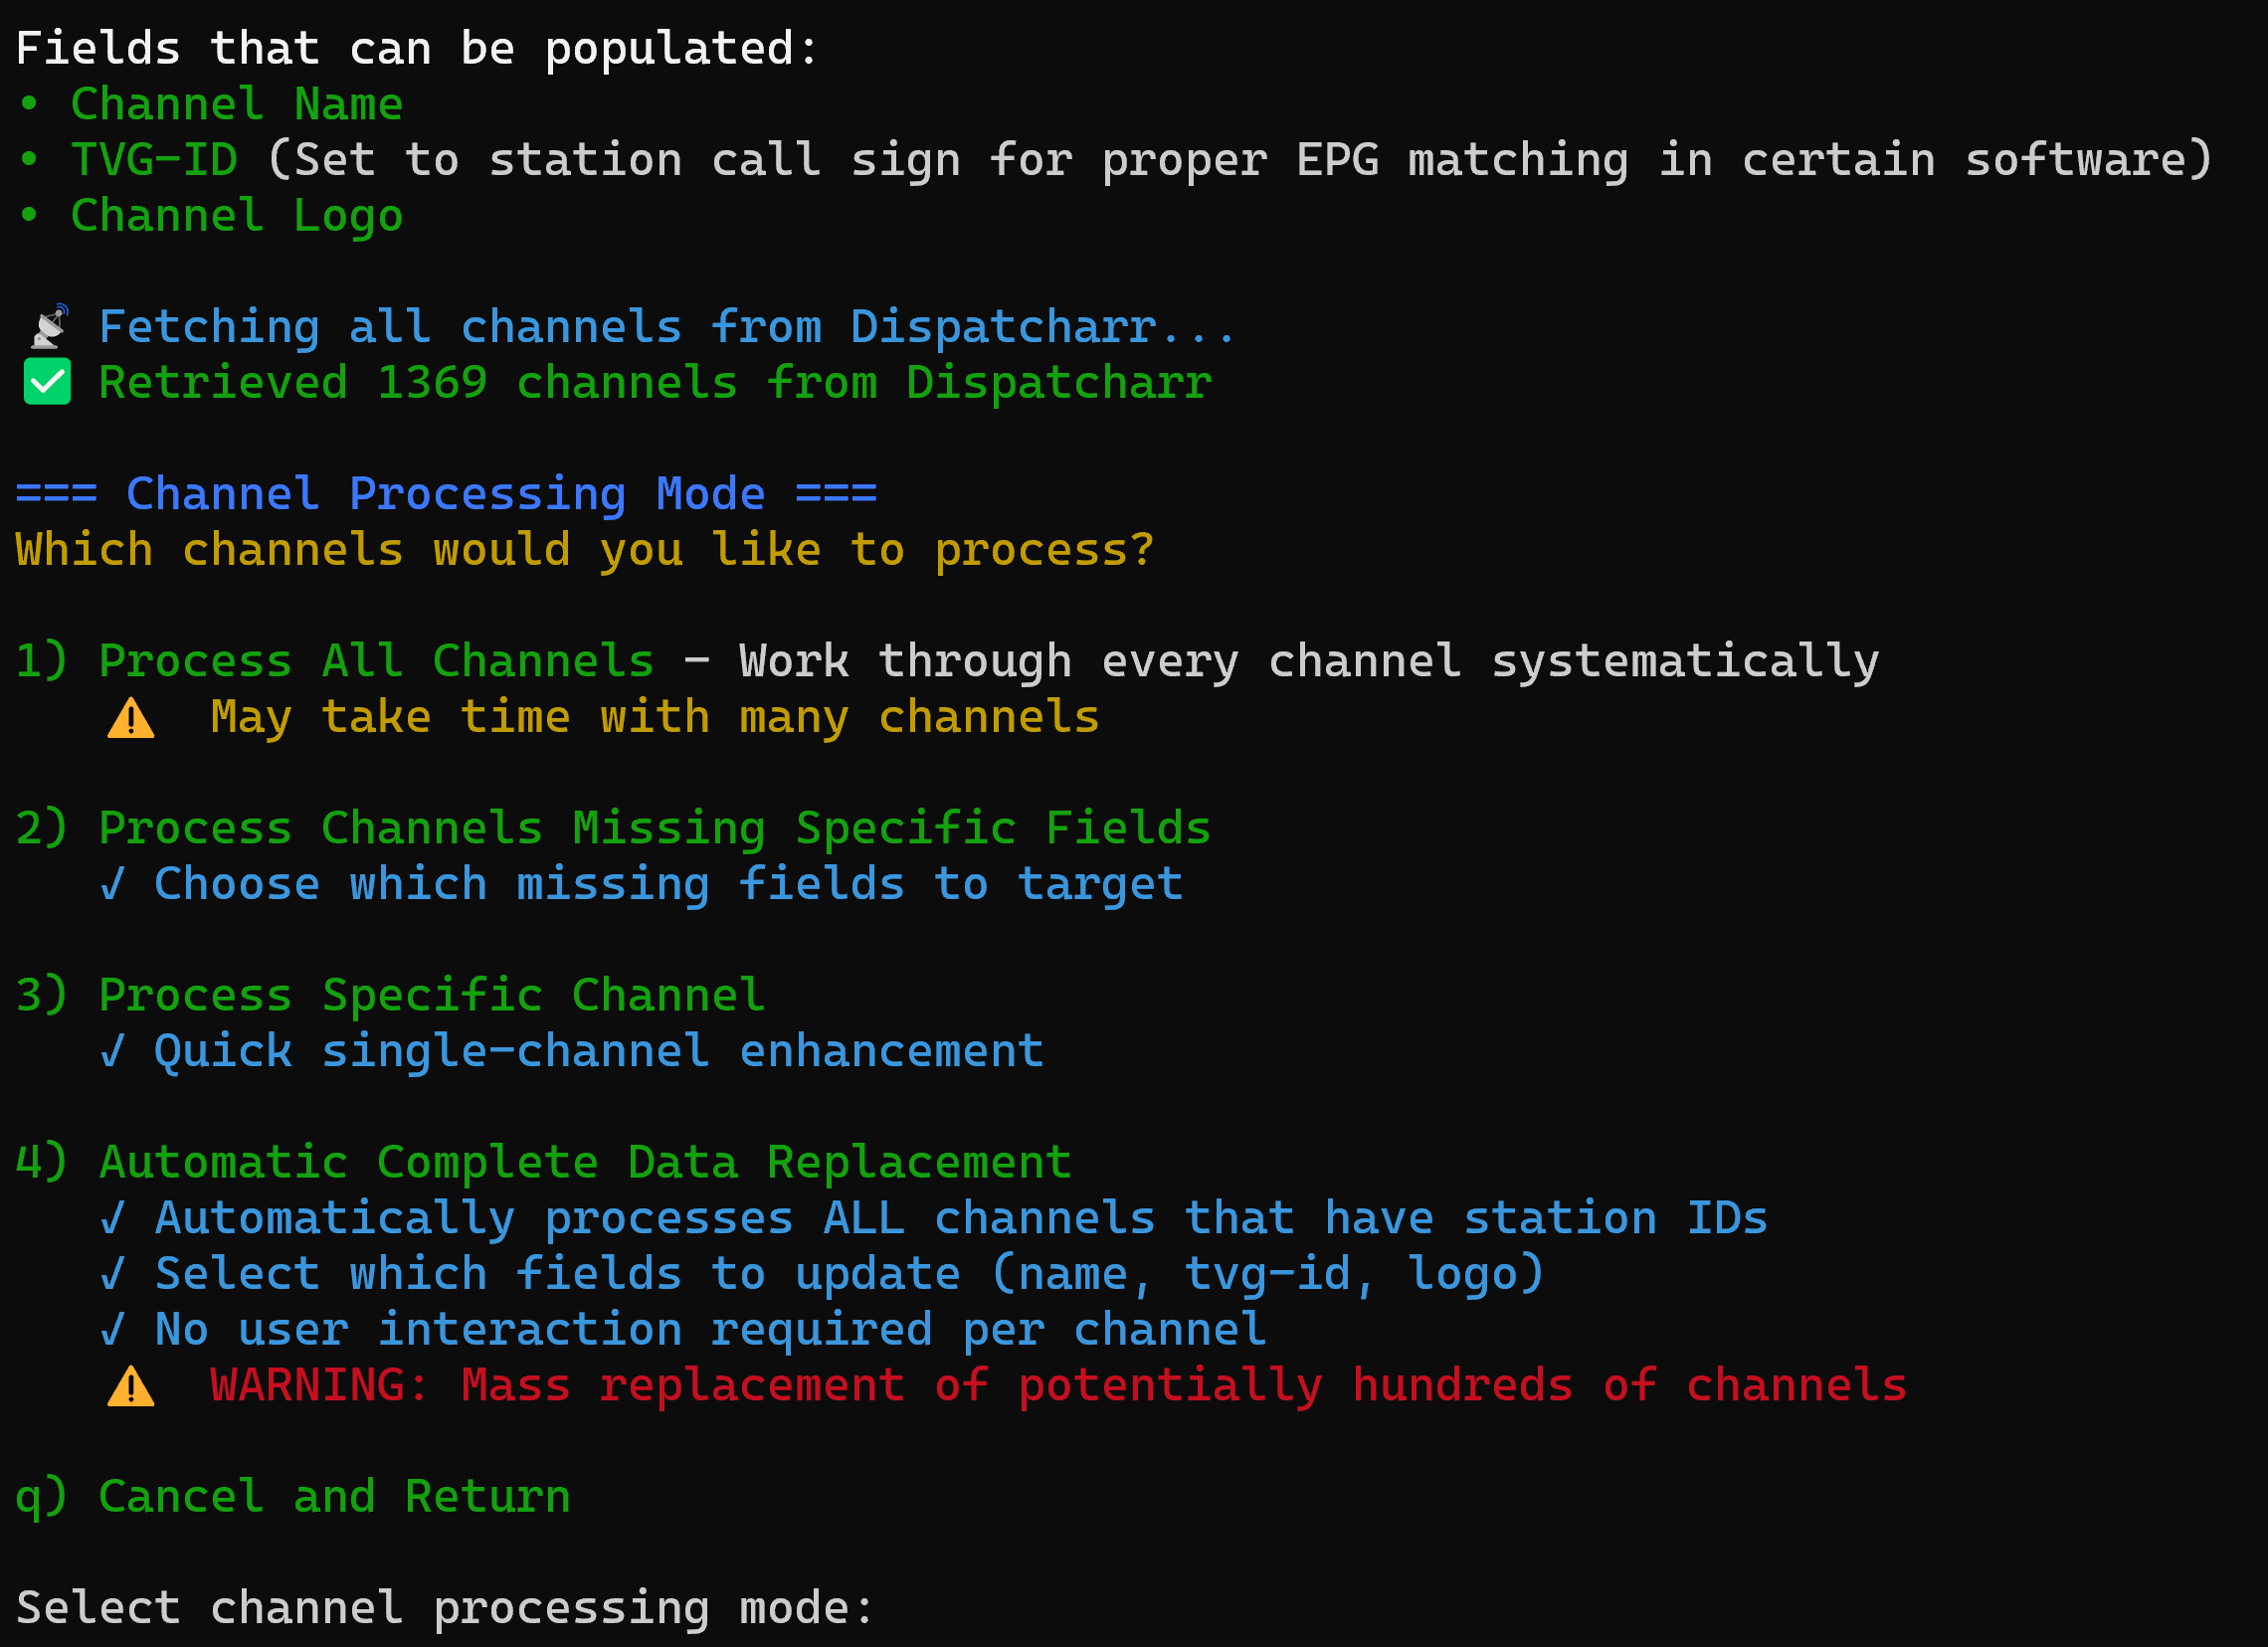
If
this is your first time setup and you need to process All Channels
choose option “1) Process All Channels”
If
you want to update channels missing certain fields (Name, TVG-ID,
Gracenote ID etc) choose option “2) Process Channels Missing
Specific Fields”
If
you just want to edit a Specific Channel choose option “3) Process
Specific Channel” and follow the prompts to select the channel
Option
“4) Automatic Complete Data Replacement” USE AT YOUR OWN RISK
For
this setup I’m using option “2) Process Channels Missing
Specific Fields”
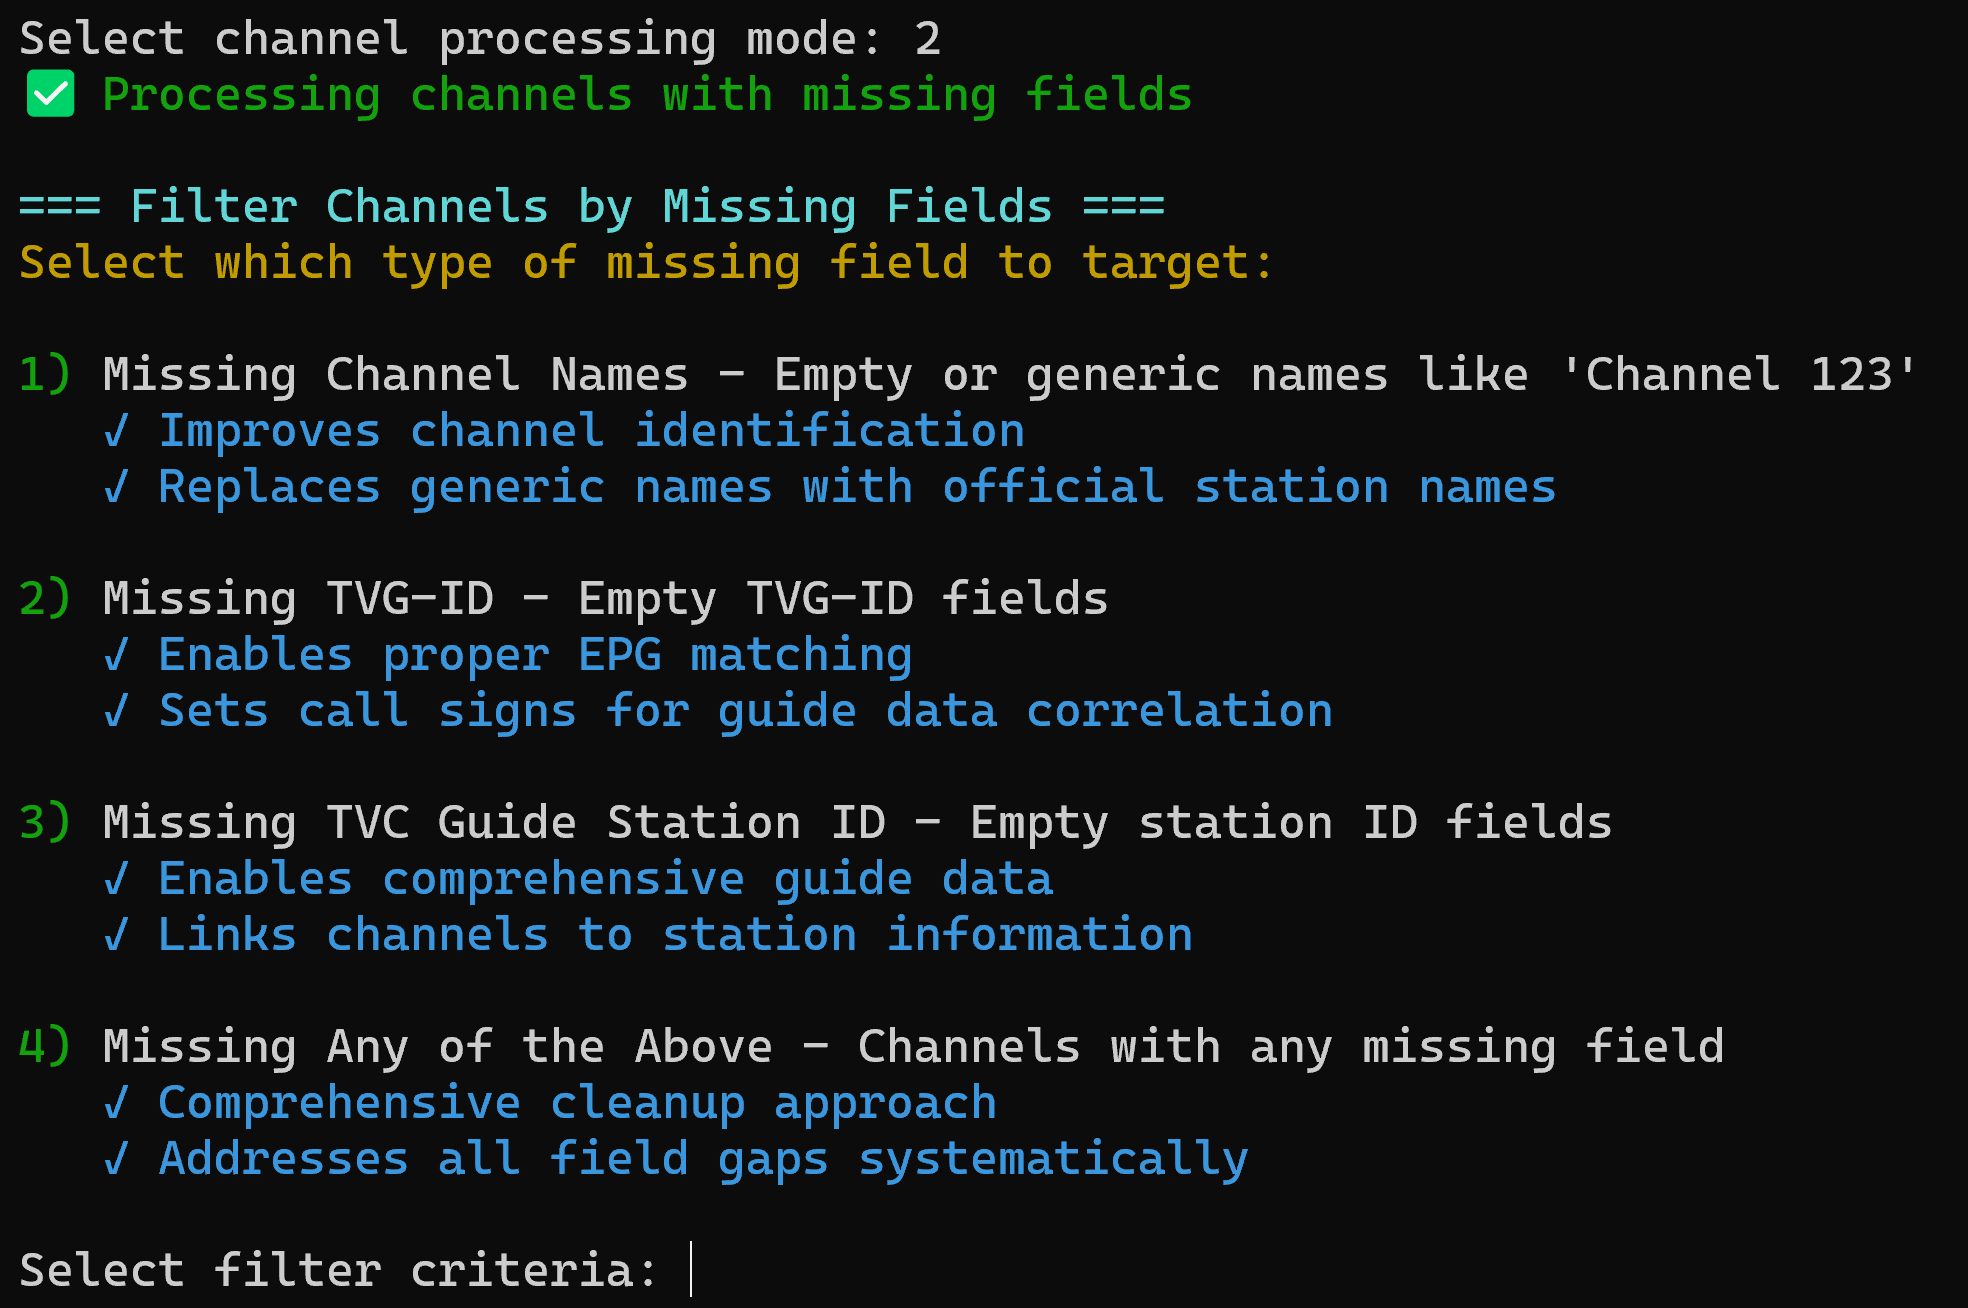
This
will be your preference but option “4) Missing Any of the Above…”
gives you the greatest control options
After
choosing Option 4 the script will scan Dispatcharr for channels
missing data and display the results:

To
begin processing choose “y” and press ENTER
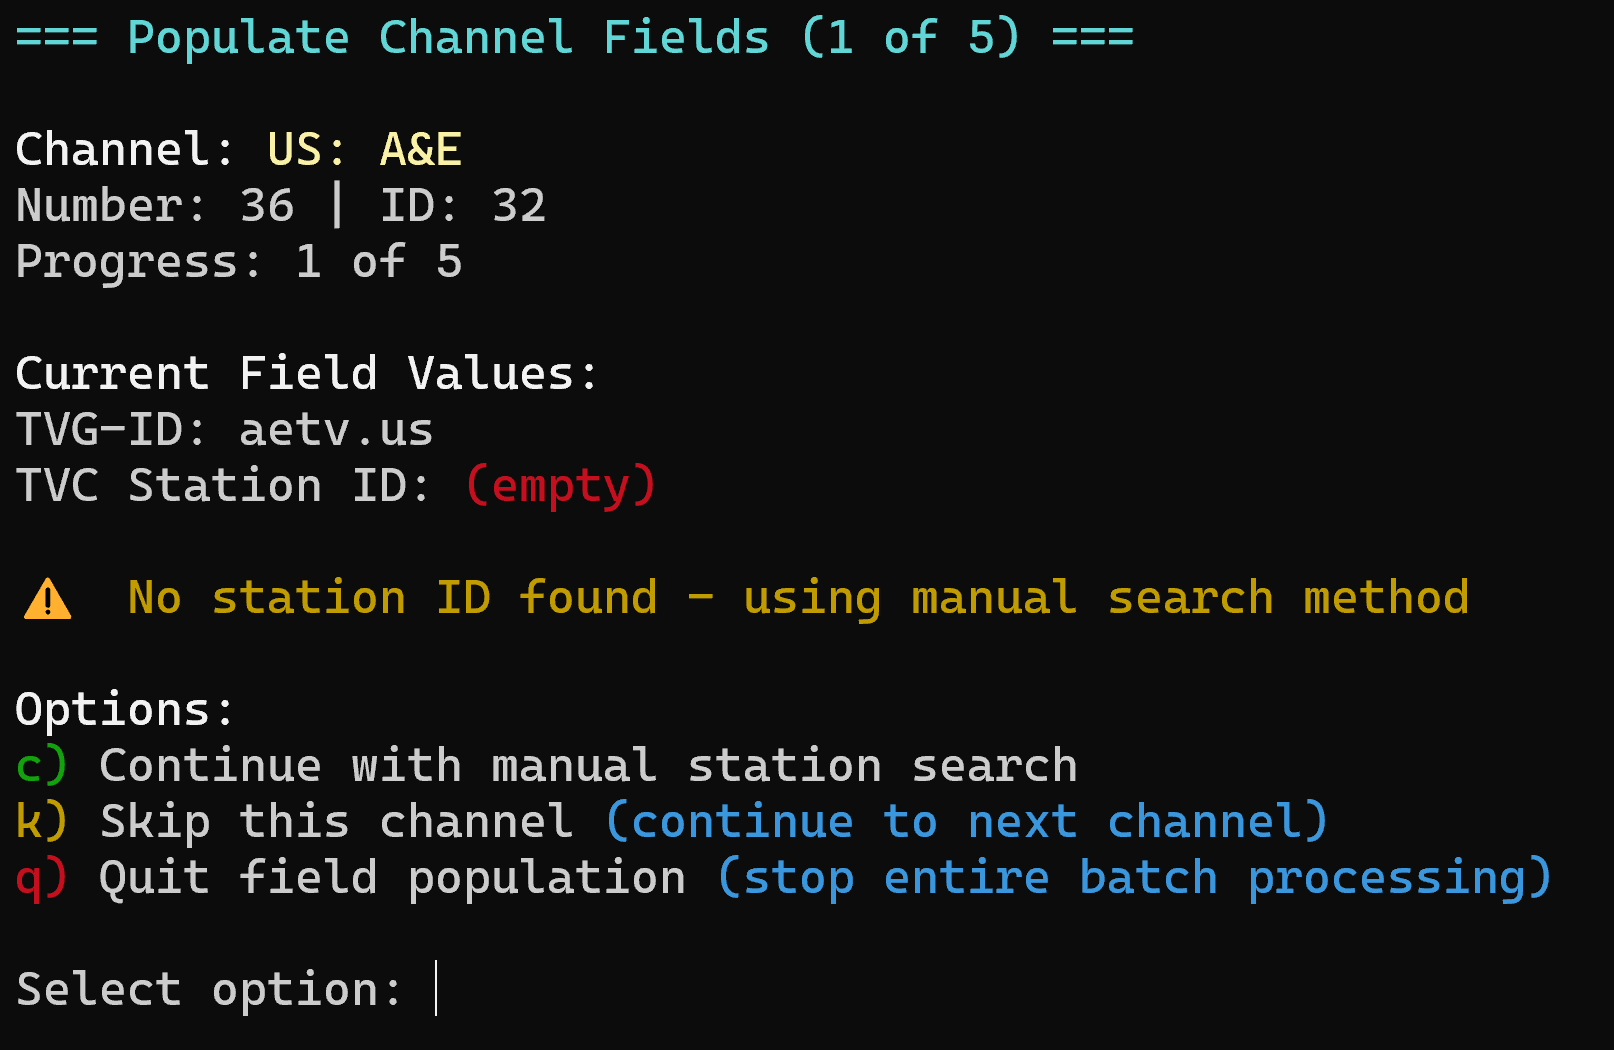
Now
you will be presented with each channel and the option “c)
Continue…” or “k) Skip…” or “q) Quit…” Press “c”
then ENTER
The
Script will attempt to match the channel automatically but a match
depends on how the channel was labeled in Dispatcharr or you may need
to do a manual search
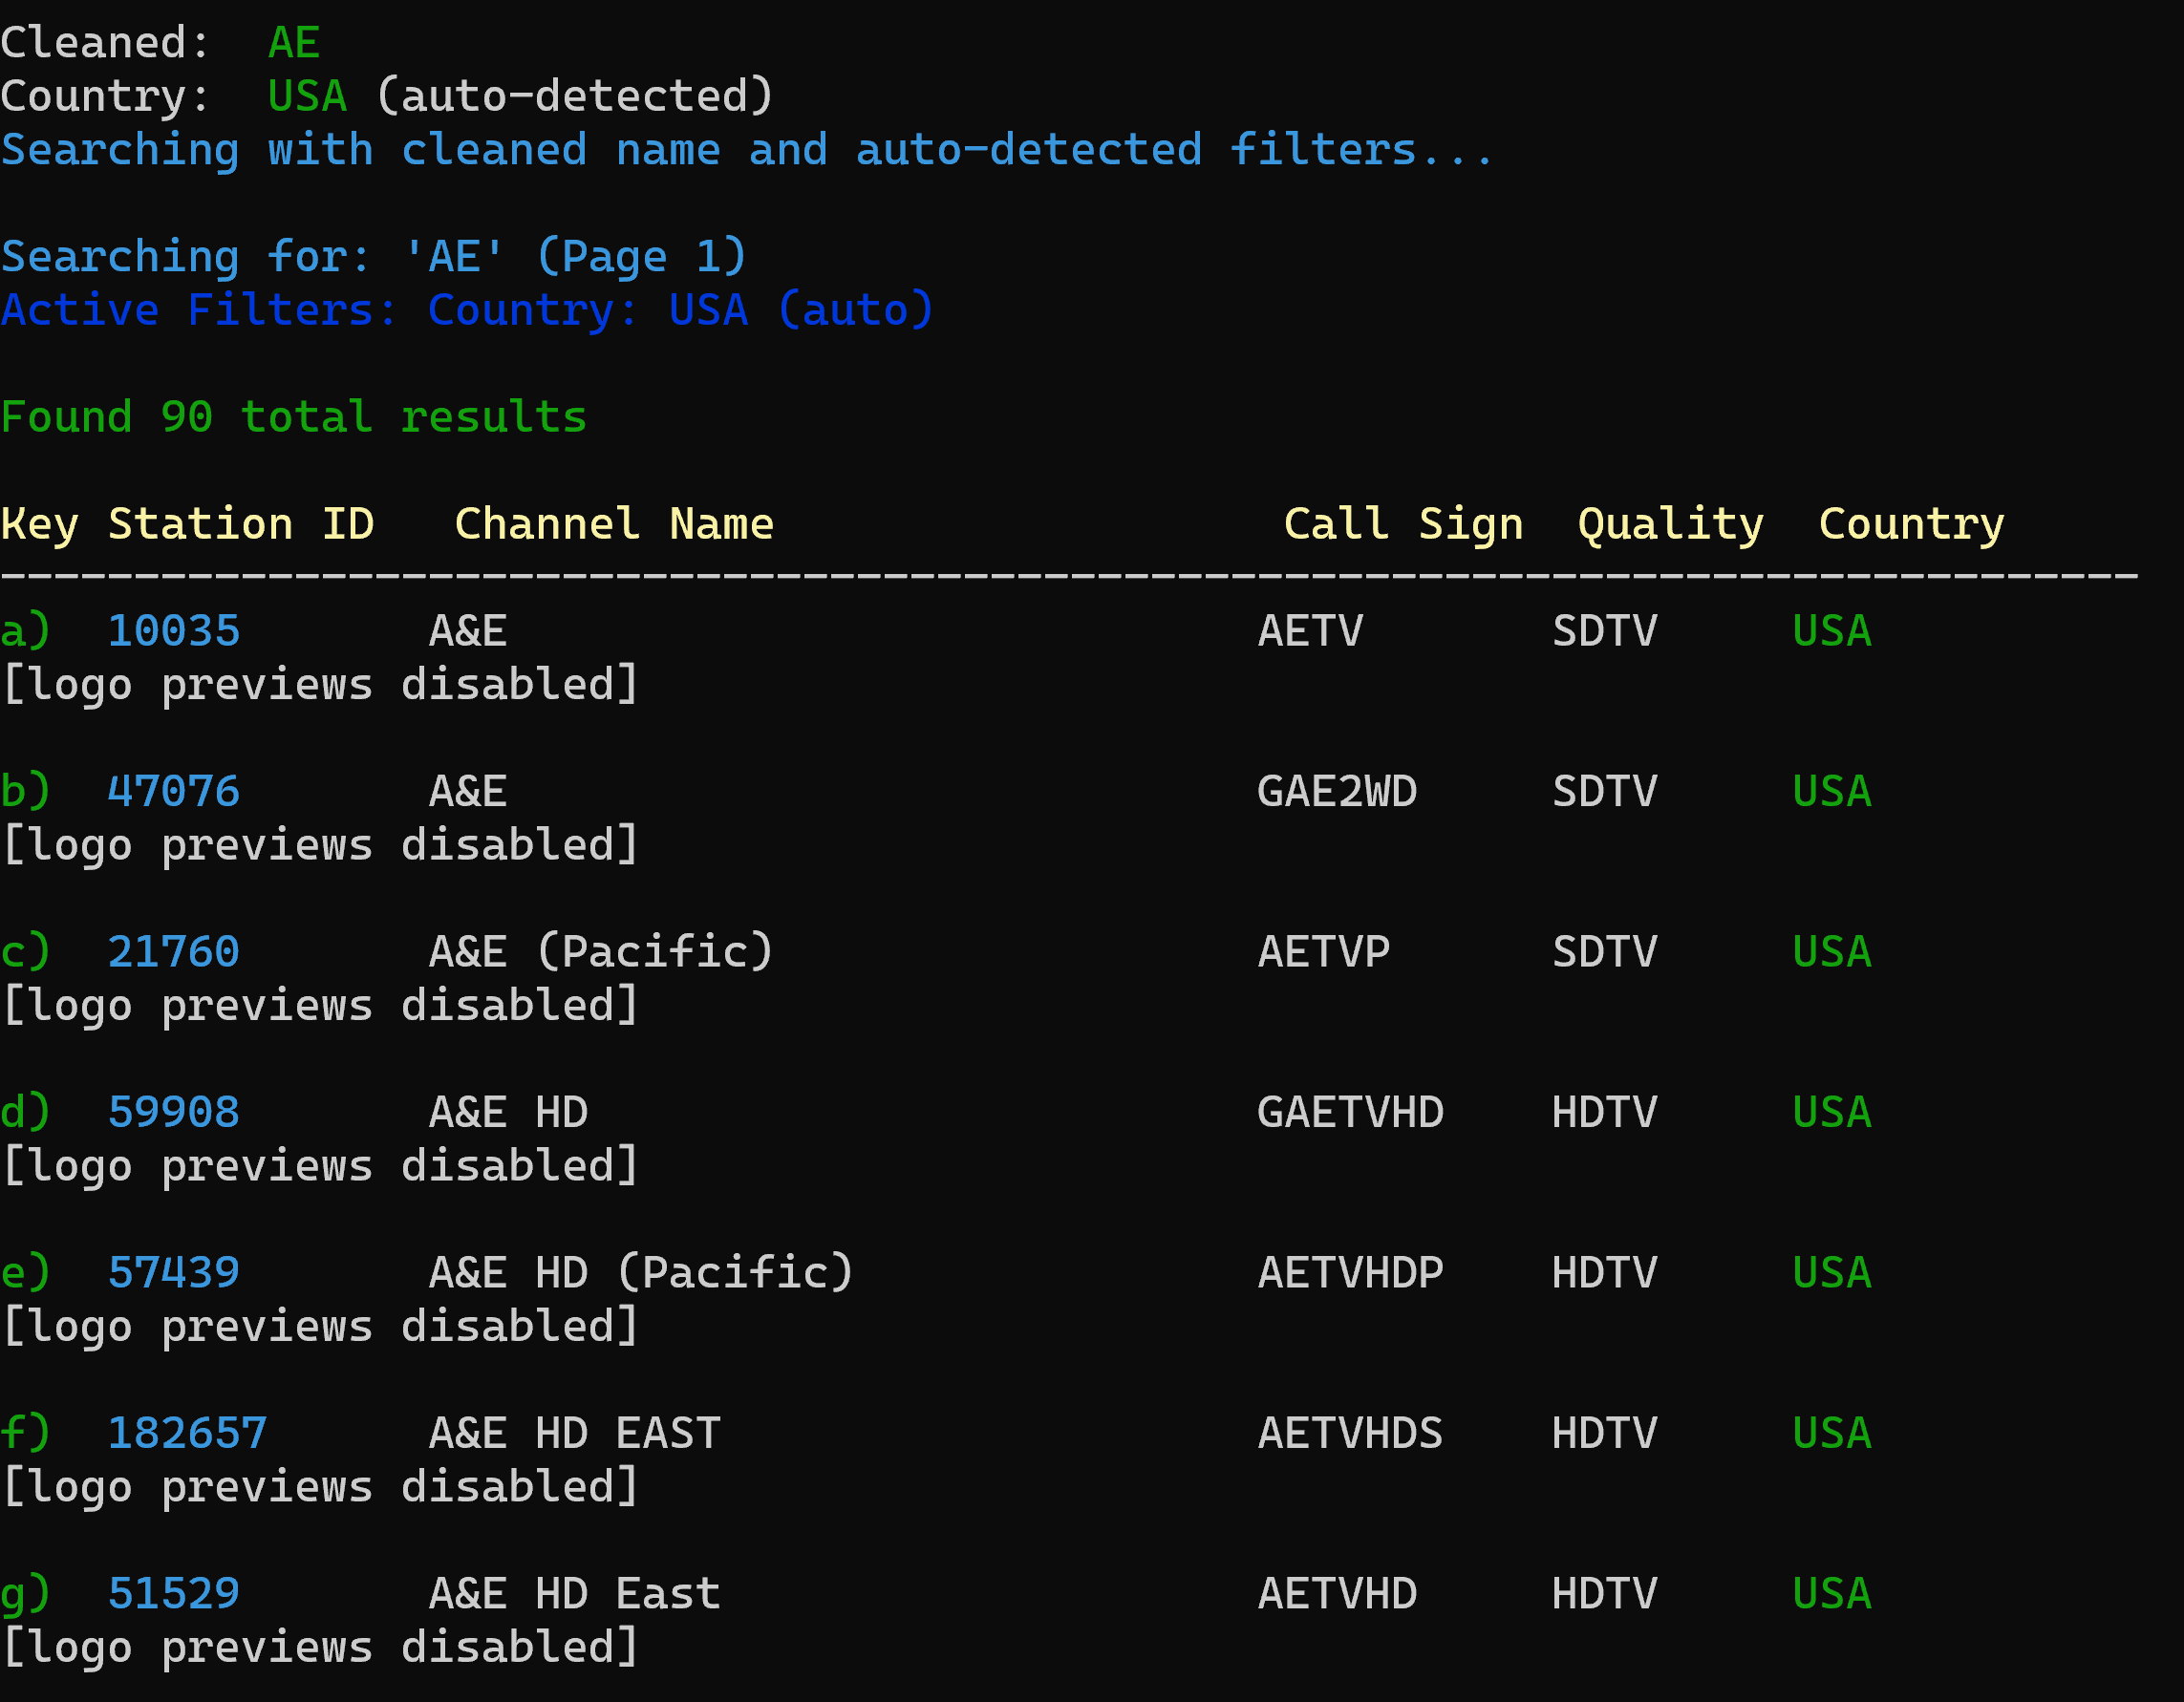
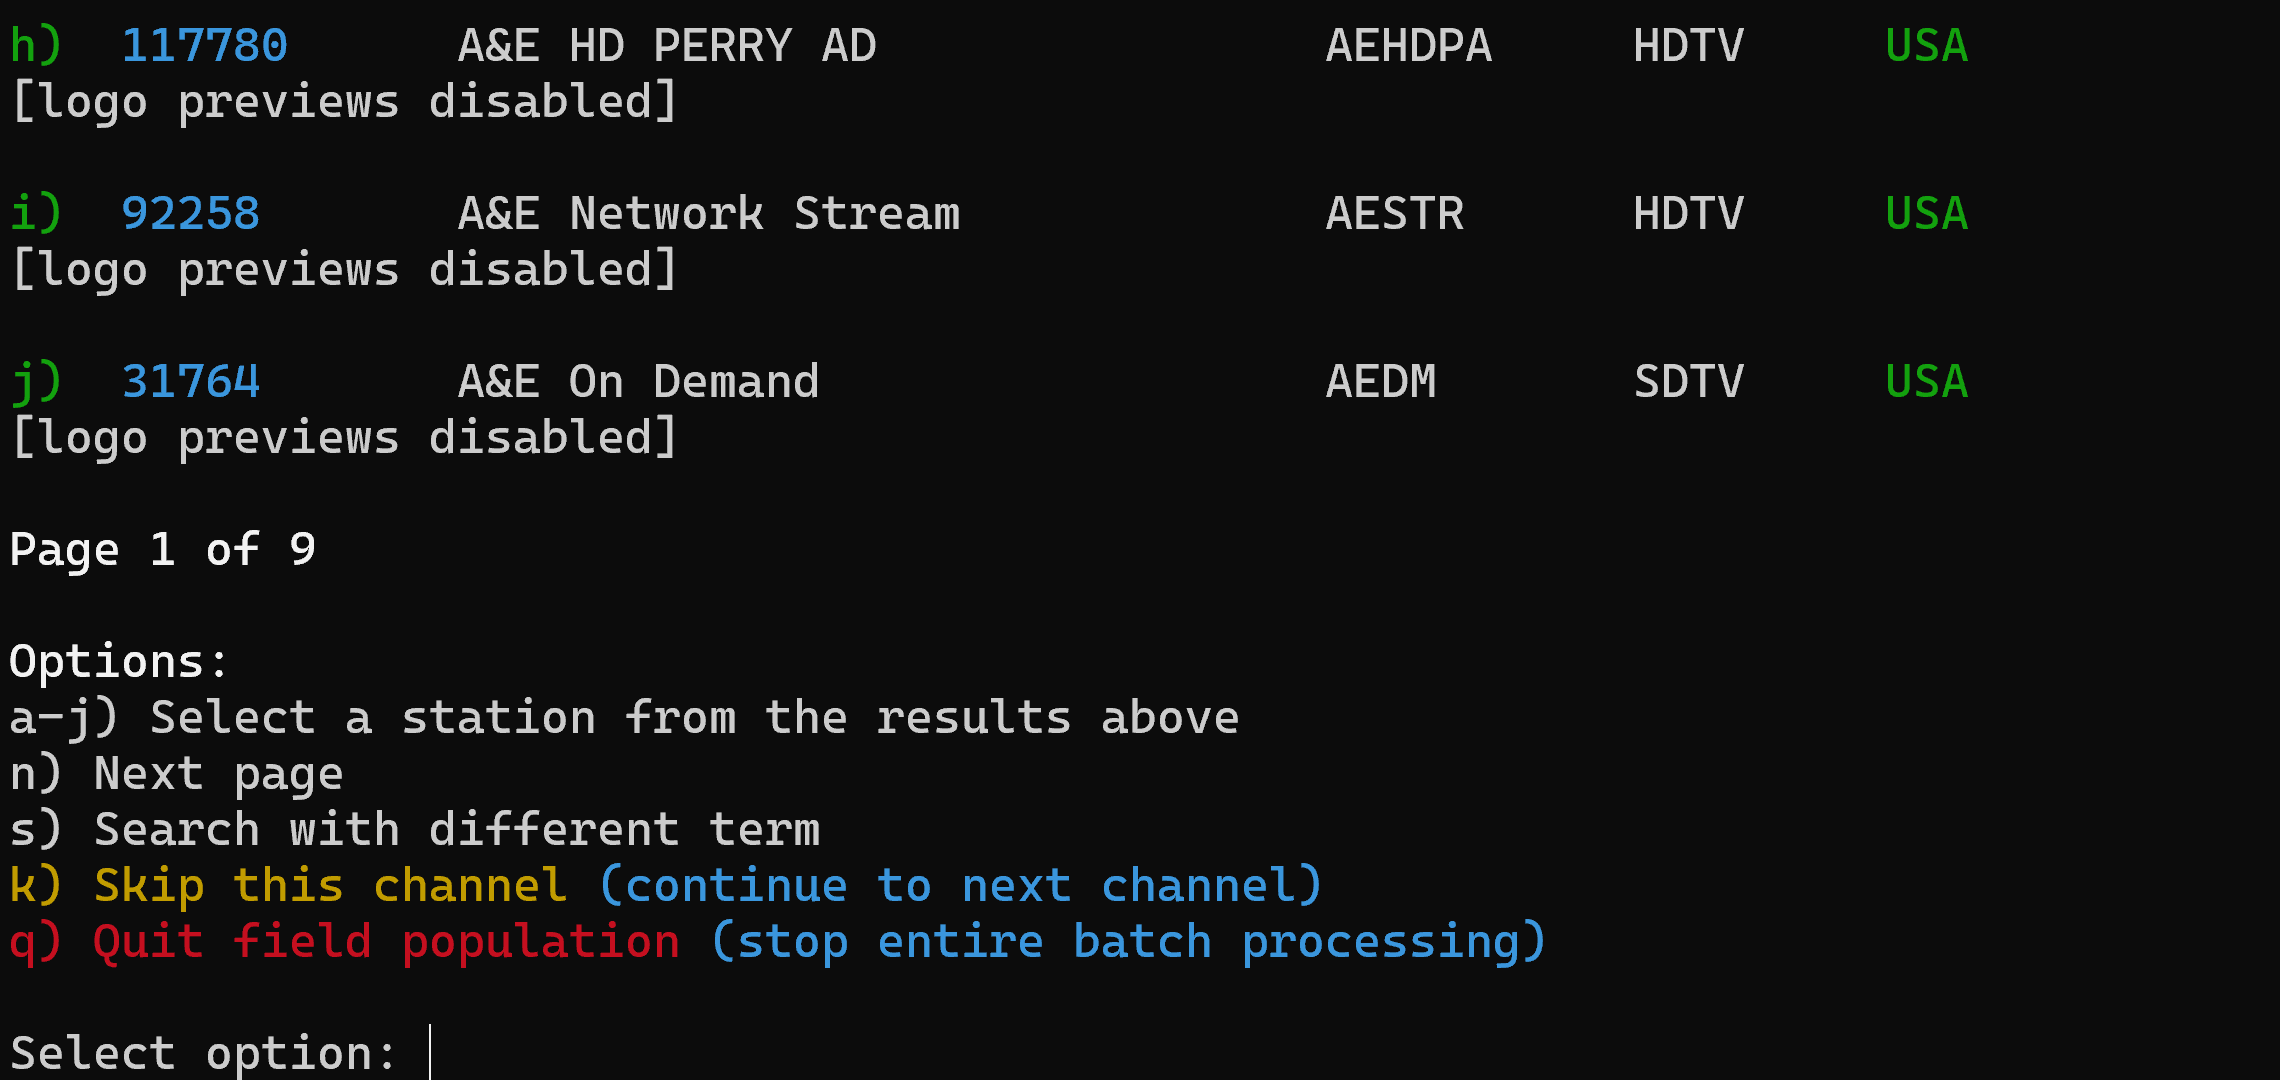
If
you have a potential match choose the letter next to it or “n) next
page” if needed. If no match choose “s) Search with a different
term” to search another way.
Once
you selected the appropriate listing you will get the options to
update fields
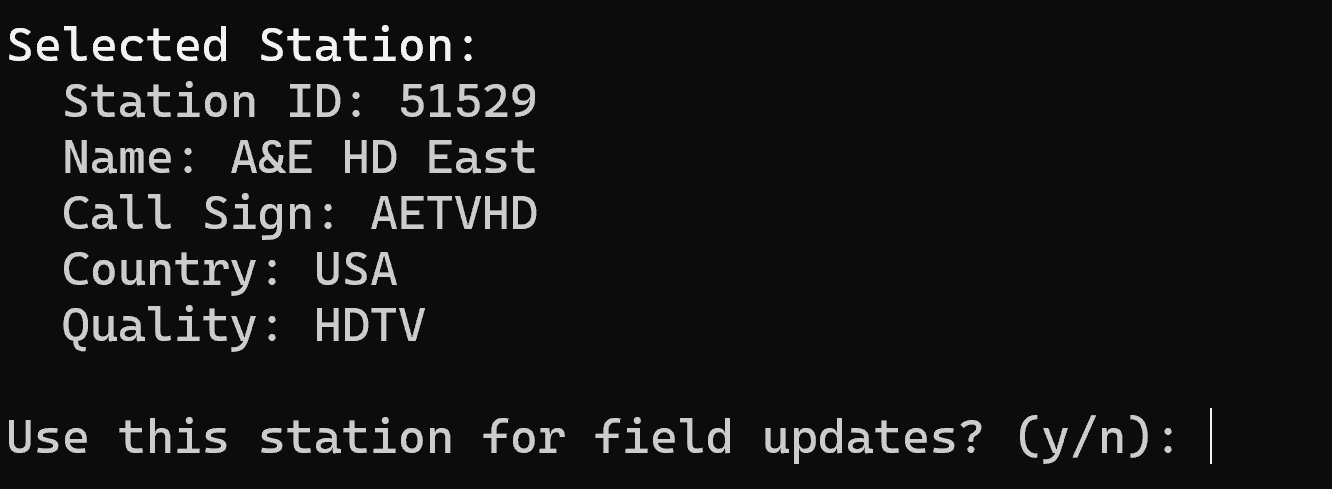
If
the choice is correct press “y” to continue
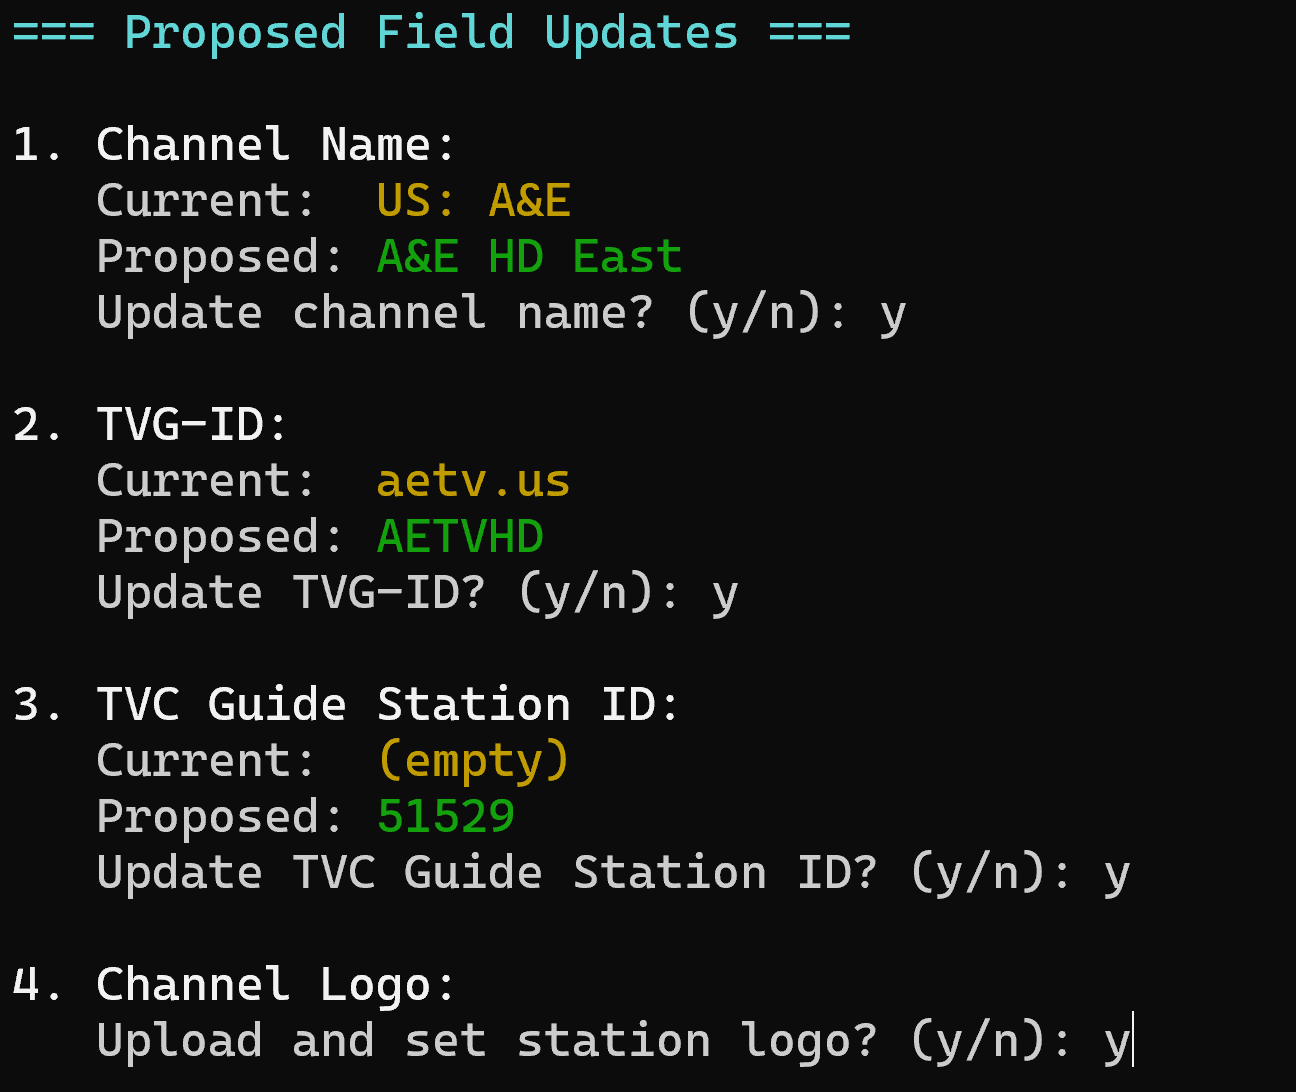
These
are personal preference to change the Name, TVG-ID and Update Logo
but add the Gracenote ID (TVC Guide Station ID)
Continue
the process for all of your channels.
Once
you are done choose option “q) Back to Dispatcharr Menu”
Then
choose option “q) Back to Main Menu”
Emby
Integration
First
you need to setup Emby with the M3U from Dispatcharr
In
Dispatcharr choose M3U and select under TVG-ID Source: Gracenote
Station ID then Copy the Generated URL

Then
go to Emby Settings to Live TV and Add TV Source and choose M3U
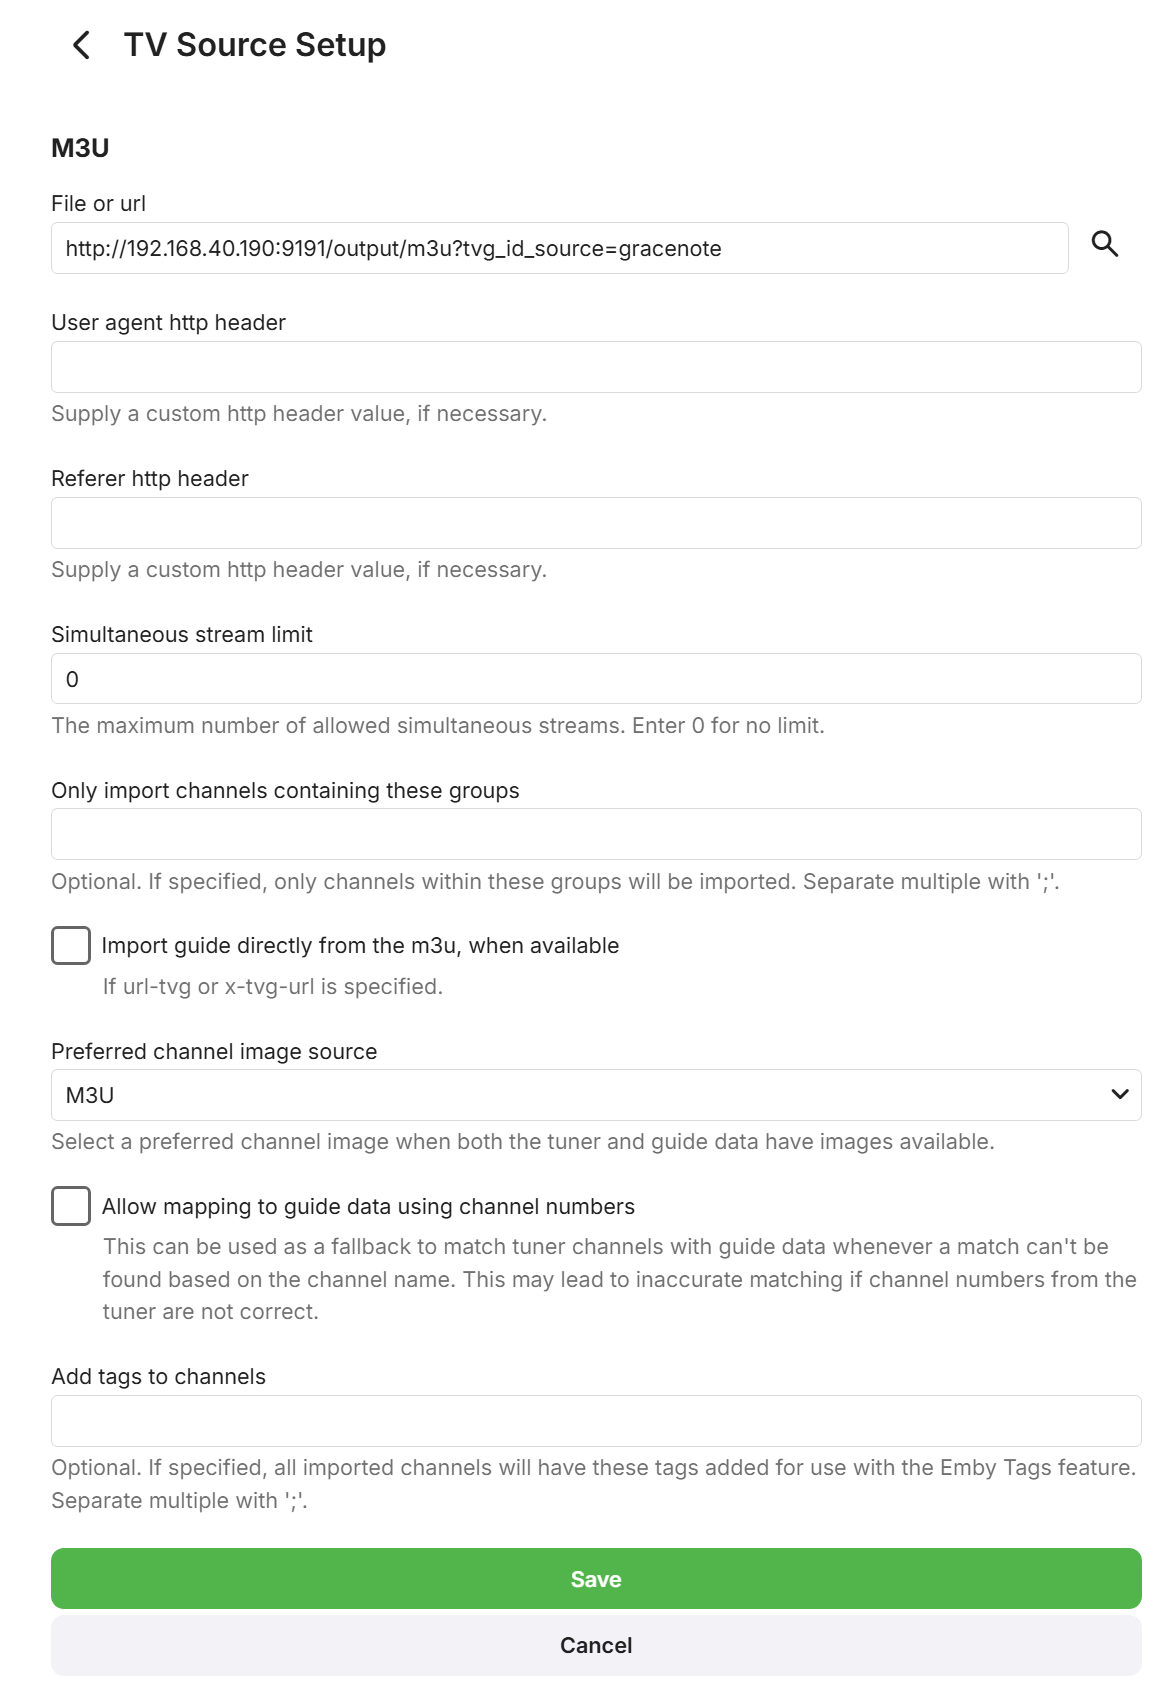
Paste
your M3U from Dispatcharr as the File or URL. Make sure the
tvg_id_source=gracenote is included in the URL.
Everything
else can be default and preferred channel image source is your
preference if you want the logos saved in Dispatcharr or the Emby
Guide Data logos and press Save. DO NOT ADD AN EPG SOURCE
Go
back to the Script
From
the Main Menu choose option “3) Emby Integration” and press ENTER
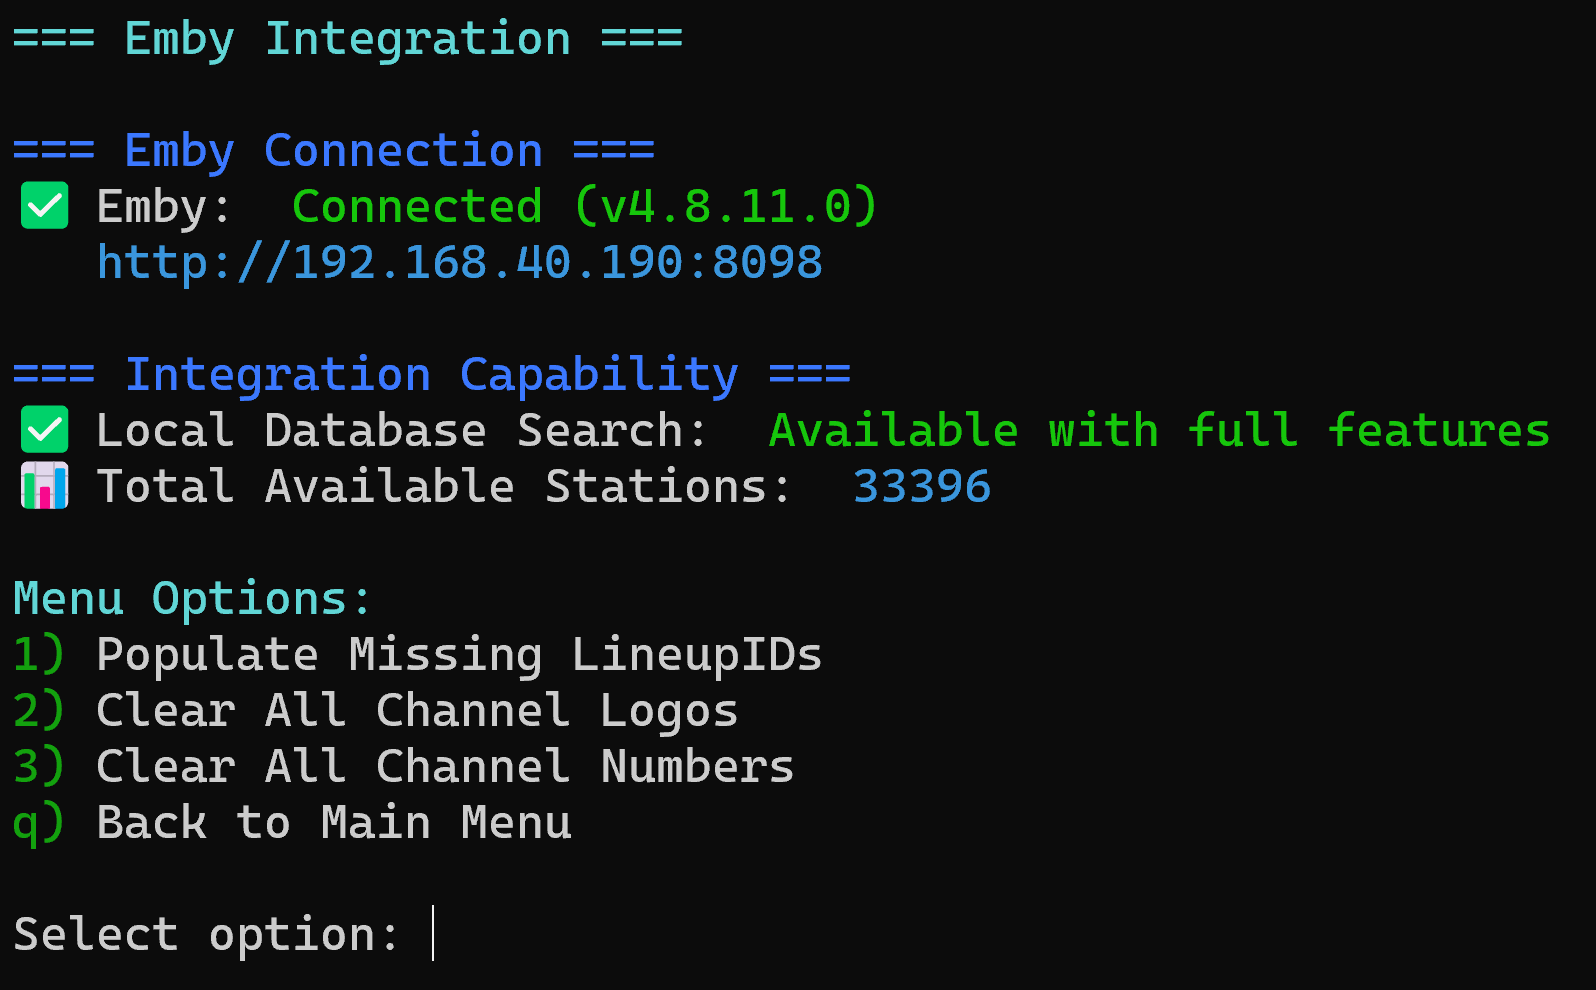
Most
will use option “1) Populate Missing Lineup IDs
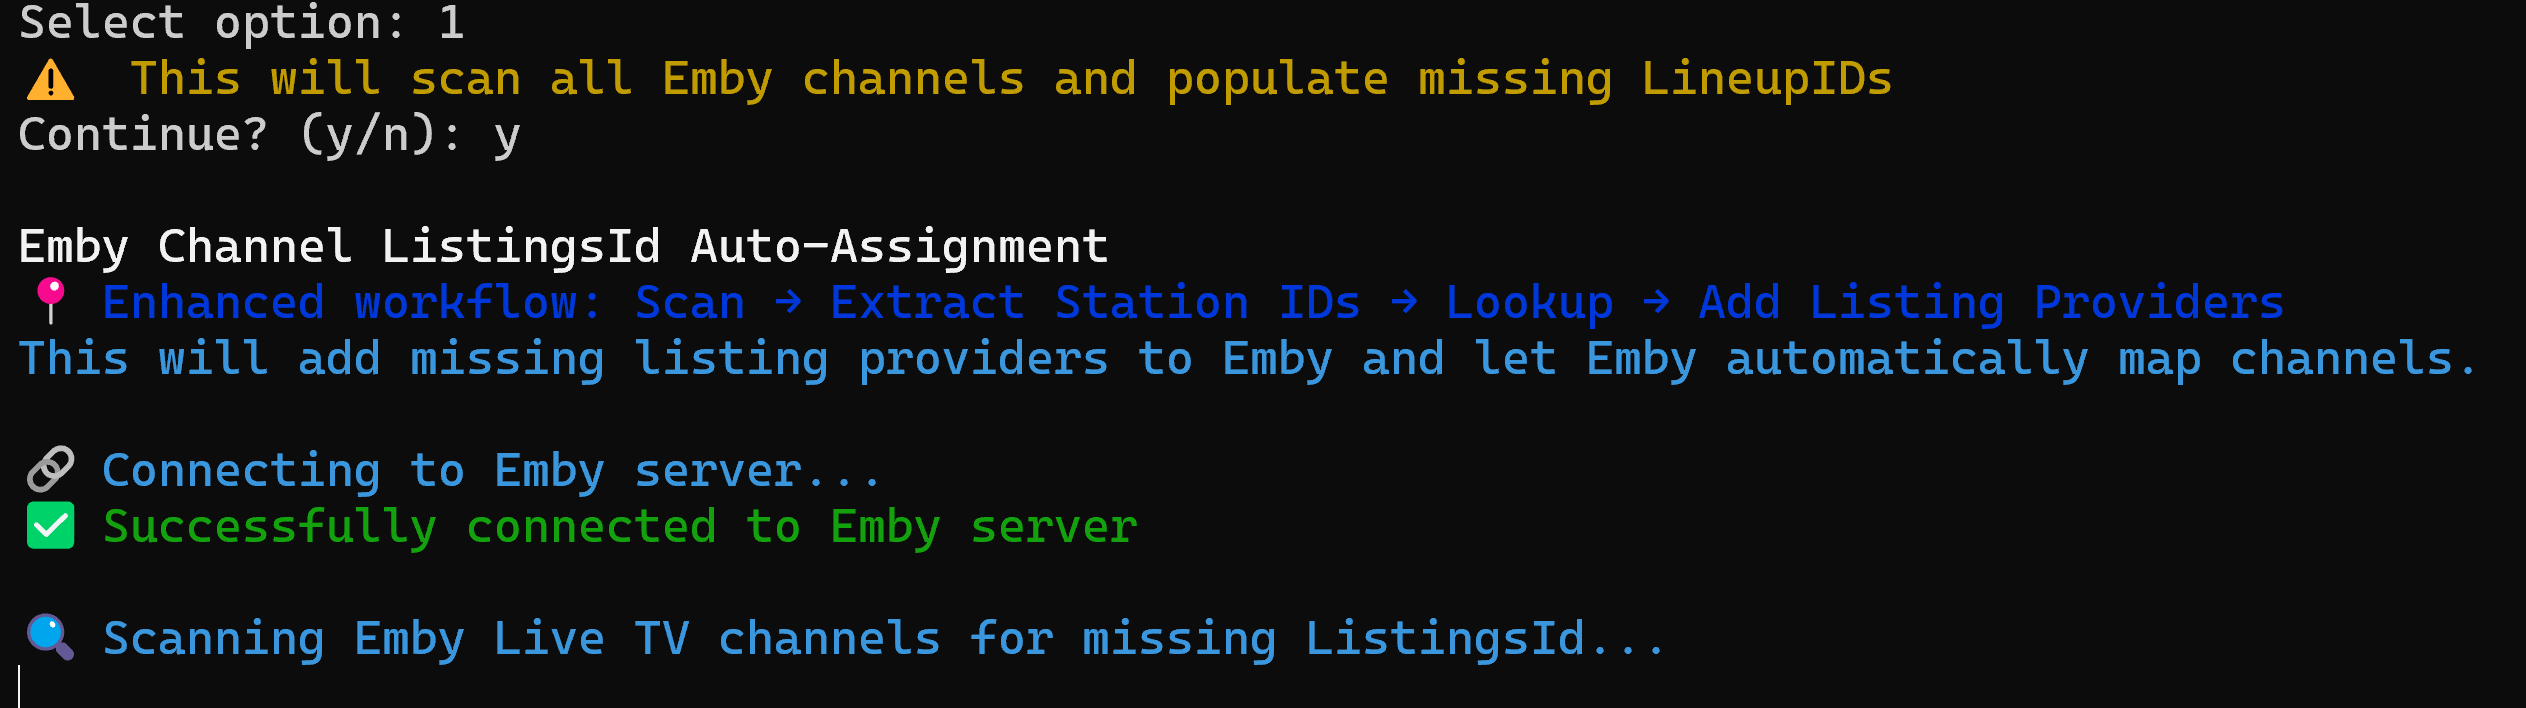
This
may take time with a lot of channels the script is scanning the
Gracenote ID from each channel to match to a LineupID including each
channel.
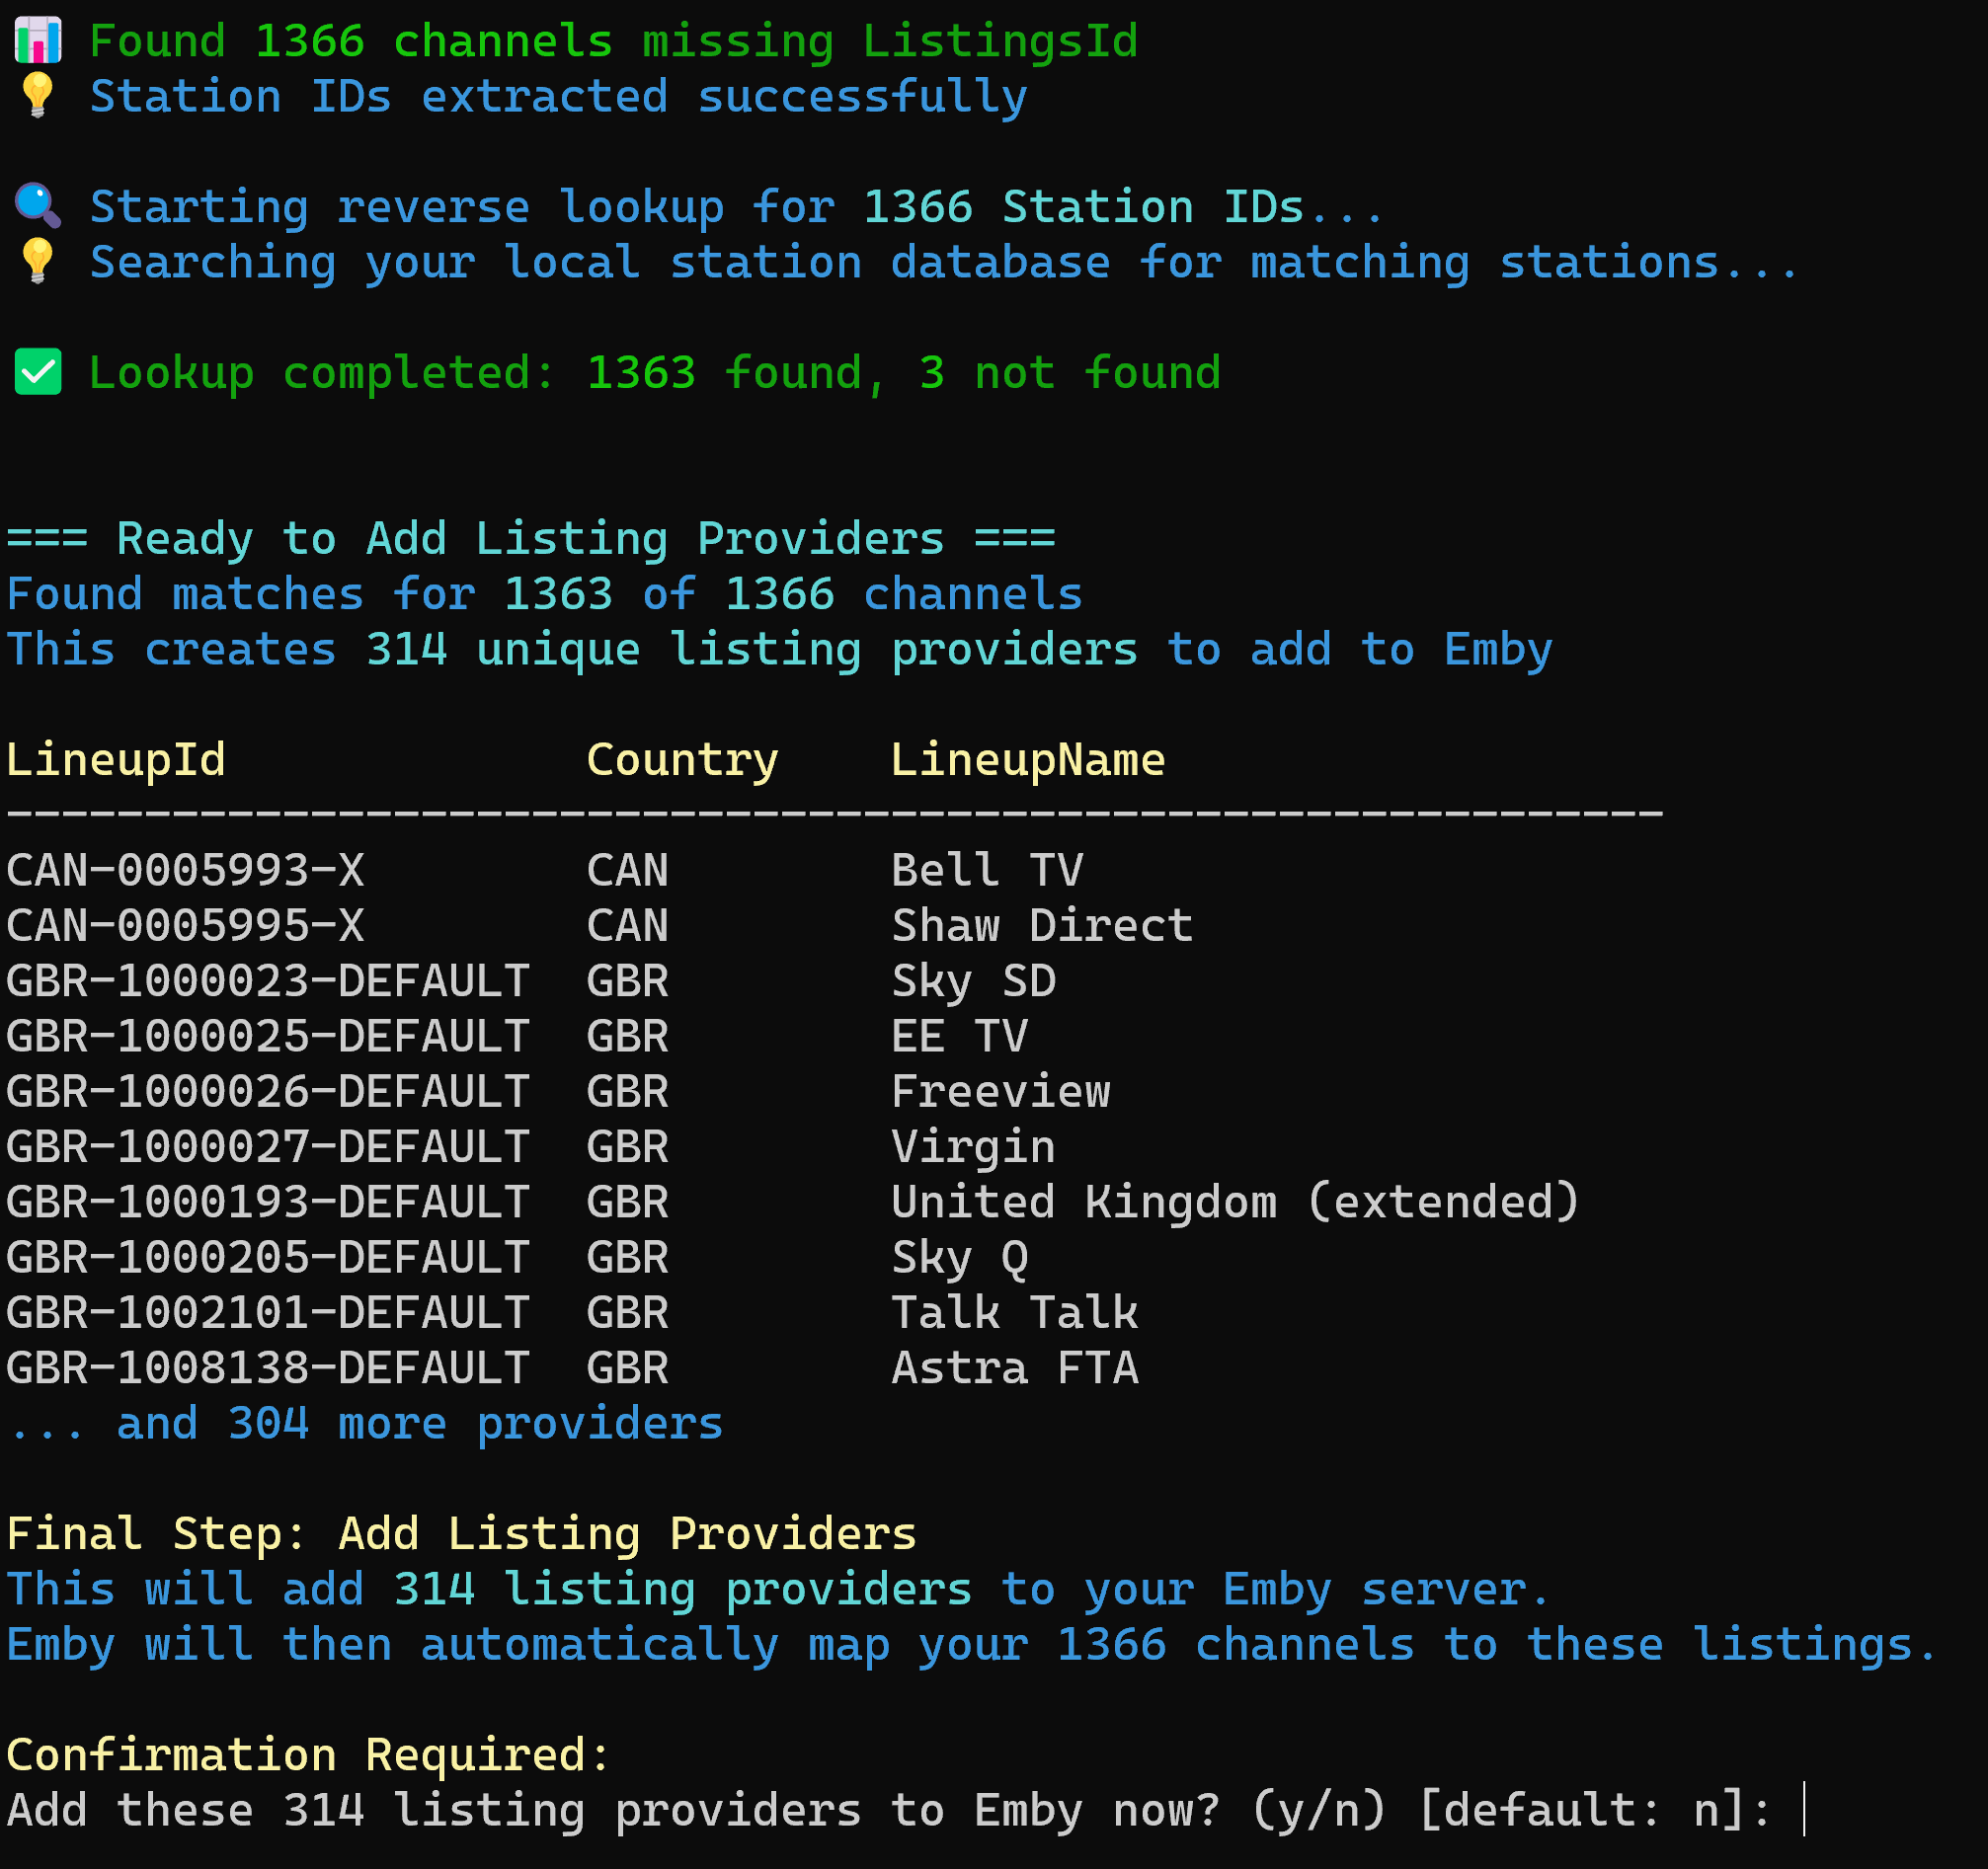
Once
Complete you’ll see a confirmation of how many lineups will be
added press y and ENTER to add them to Emby
Once
complete you will get a confirmation and press ENTER to finish
A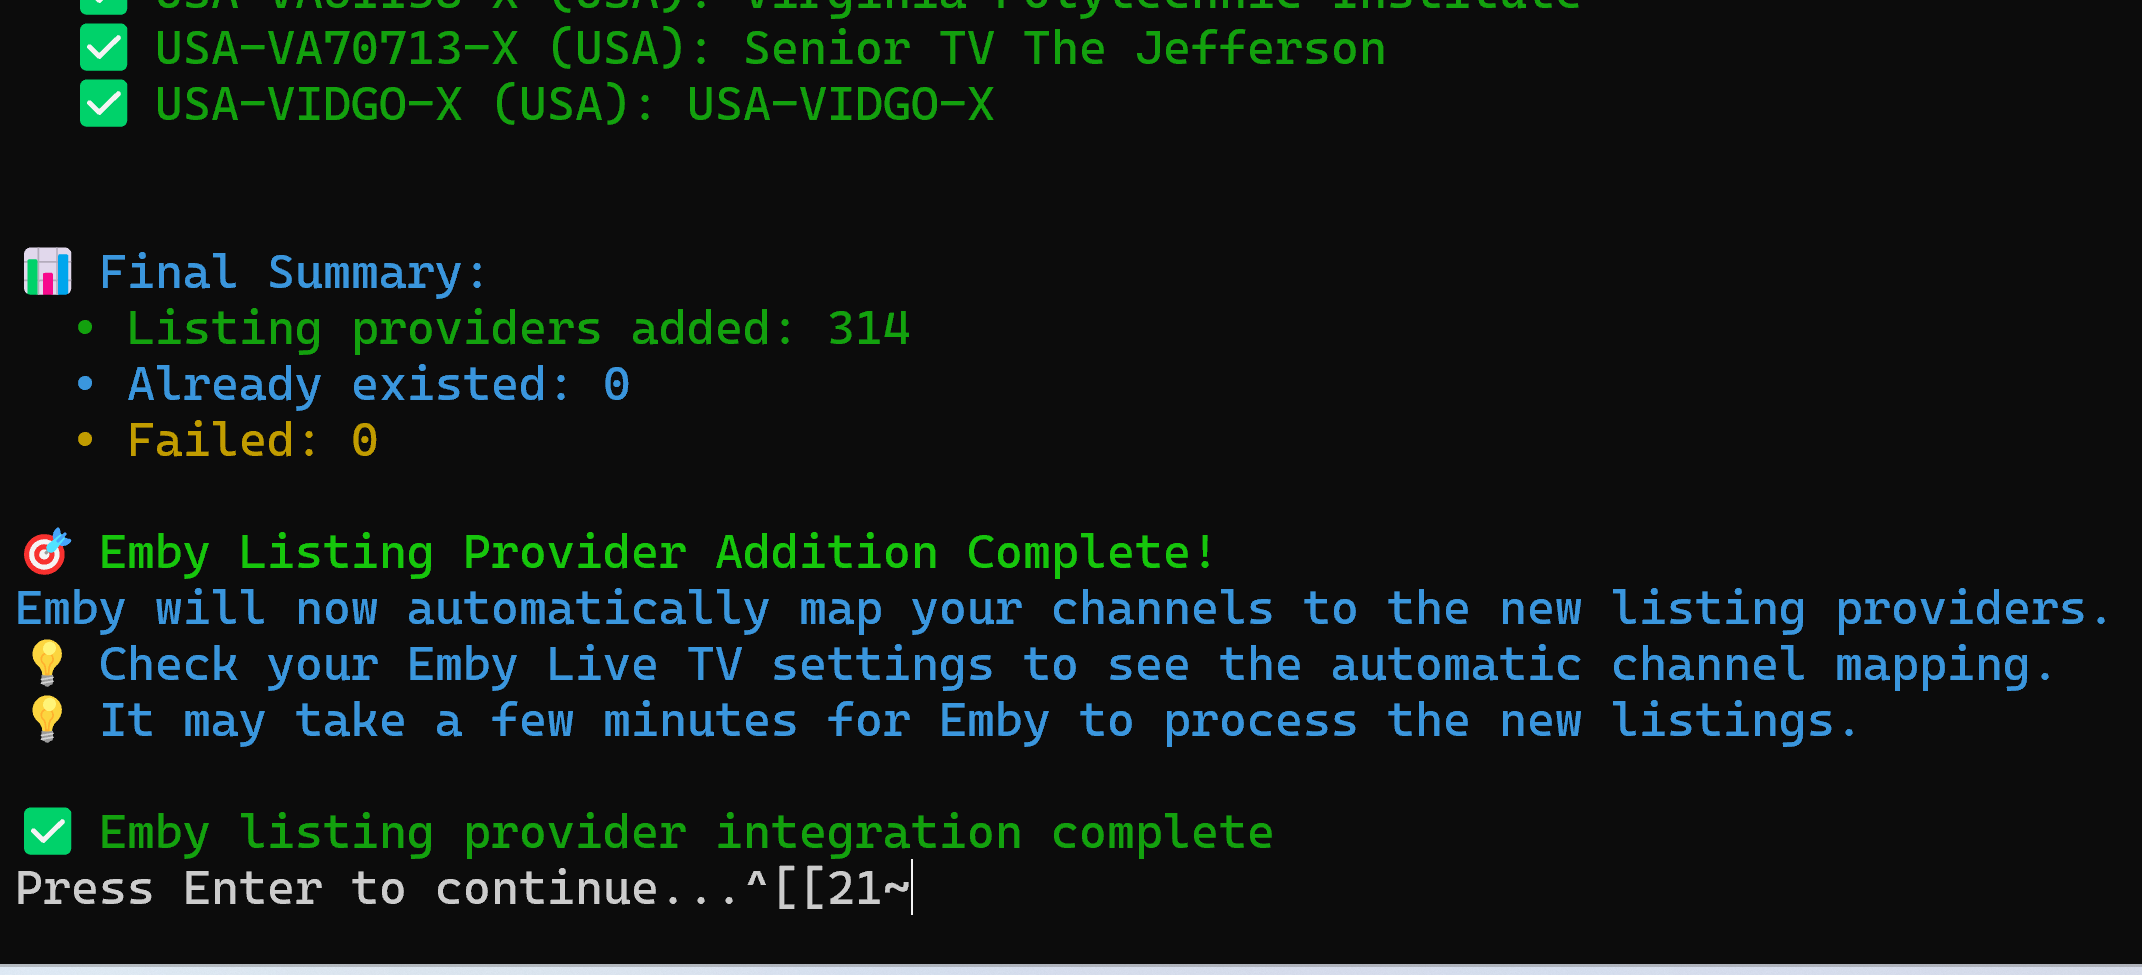
t
this point you are finished with the script and can select “q)
Back to Main Menu” then “q) Exit” to close the Script or Docker
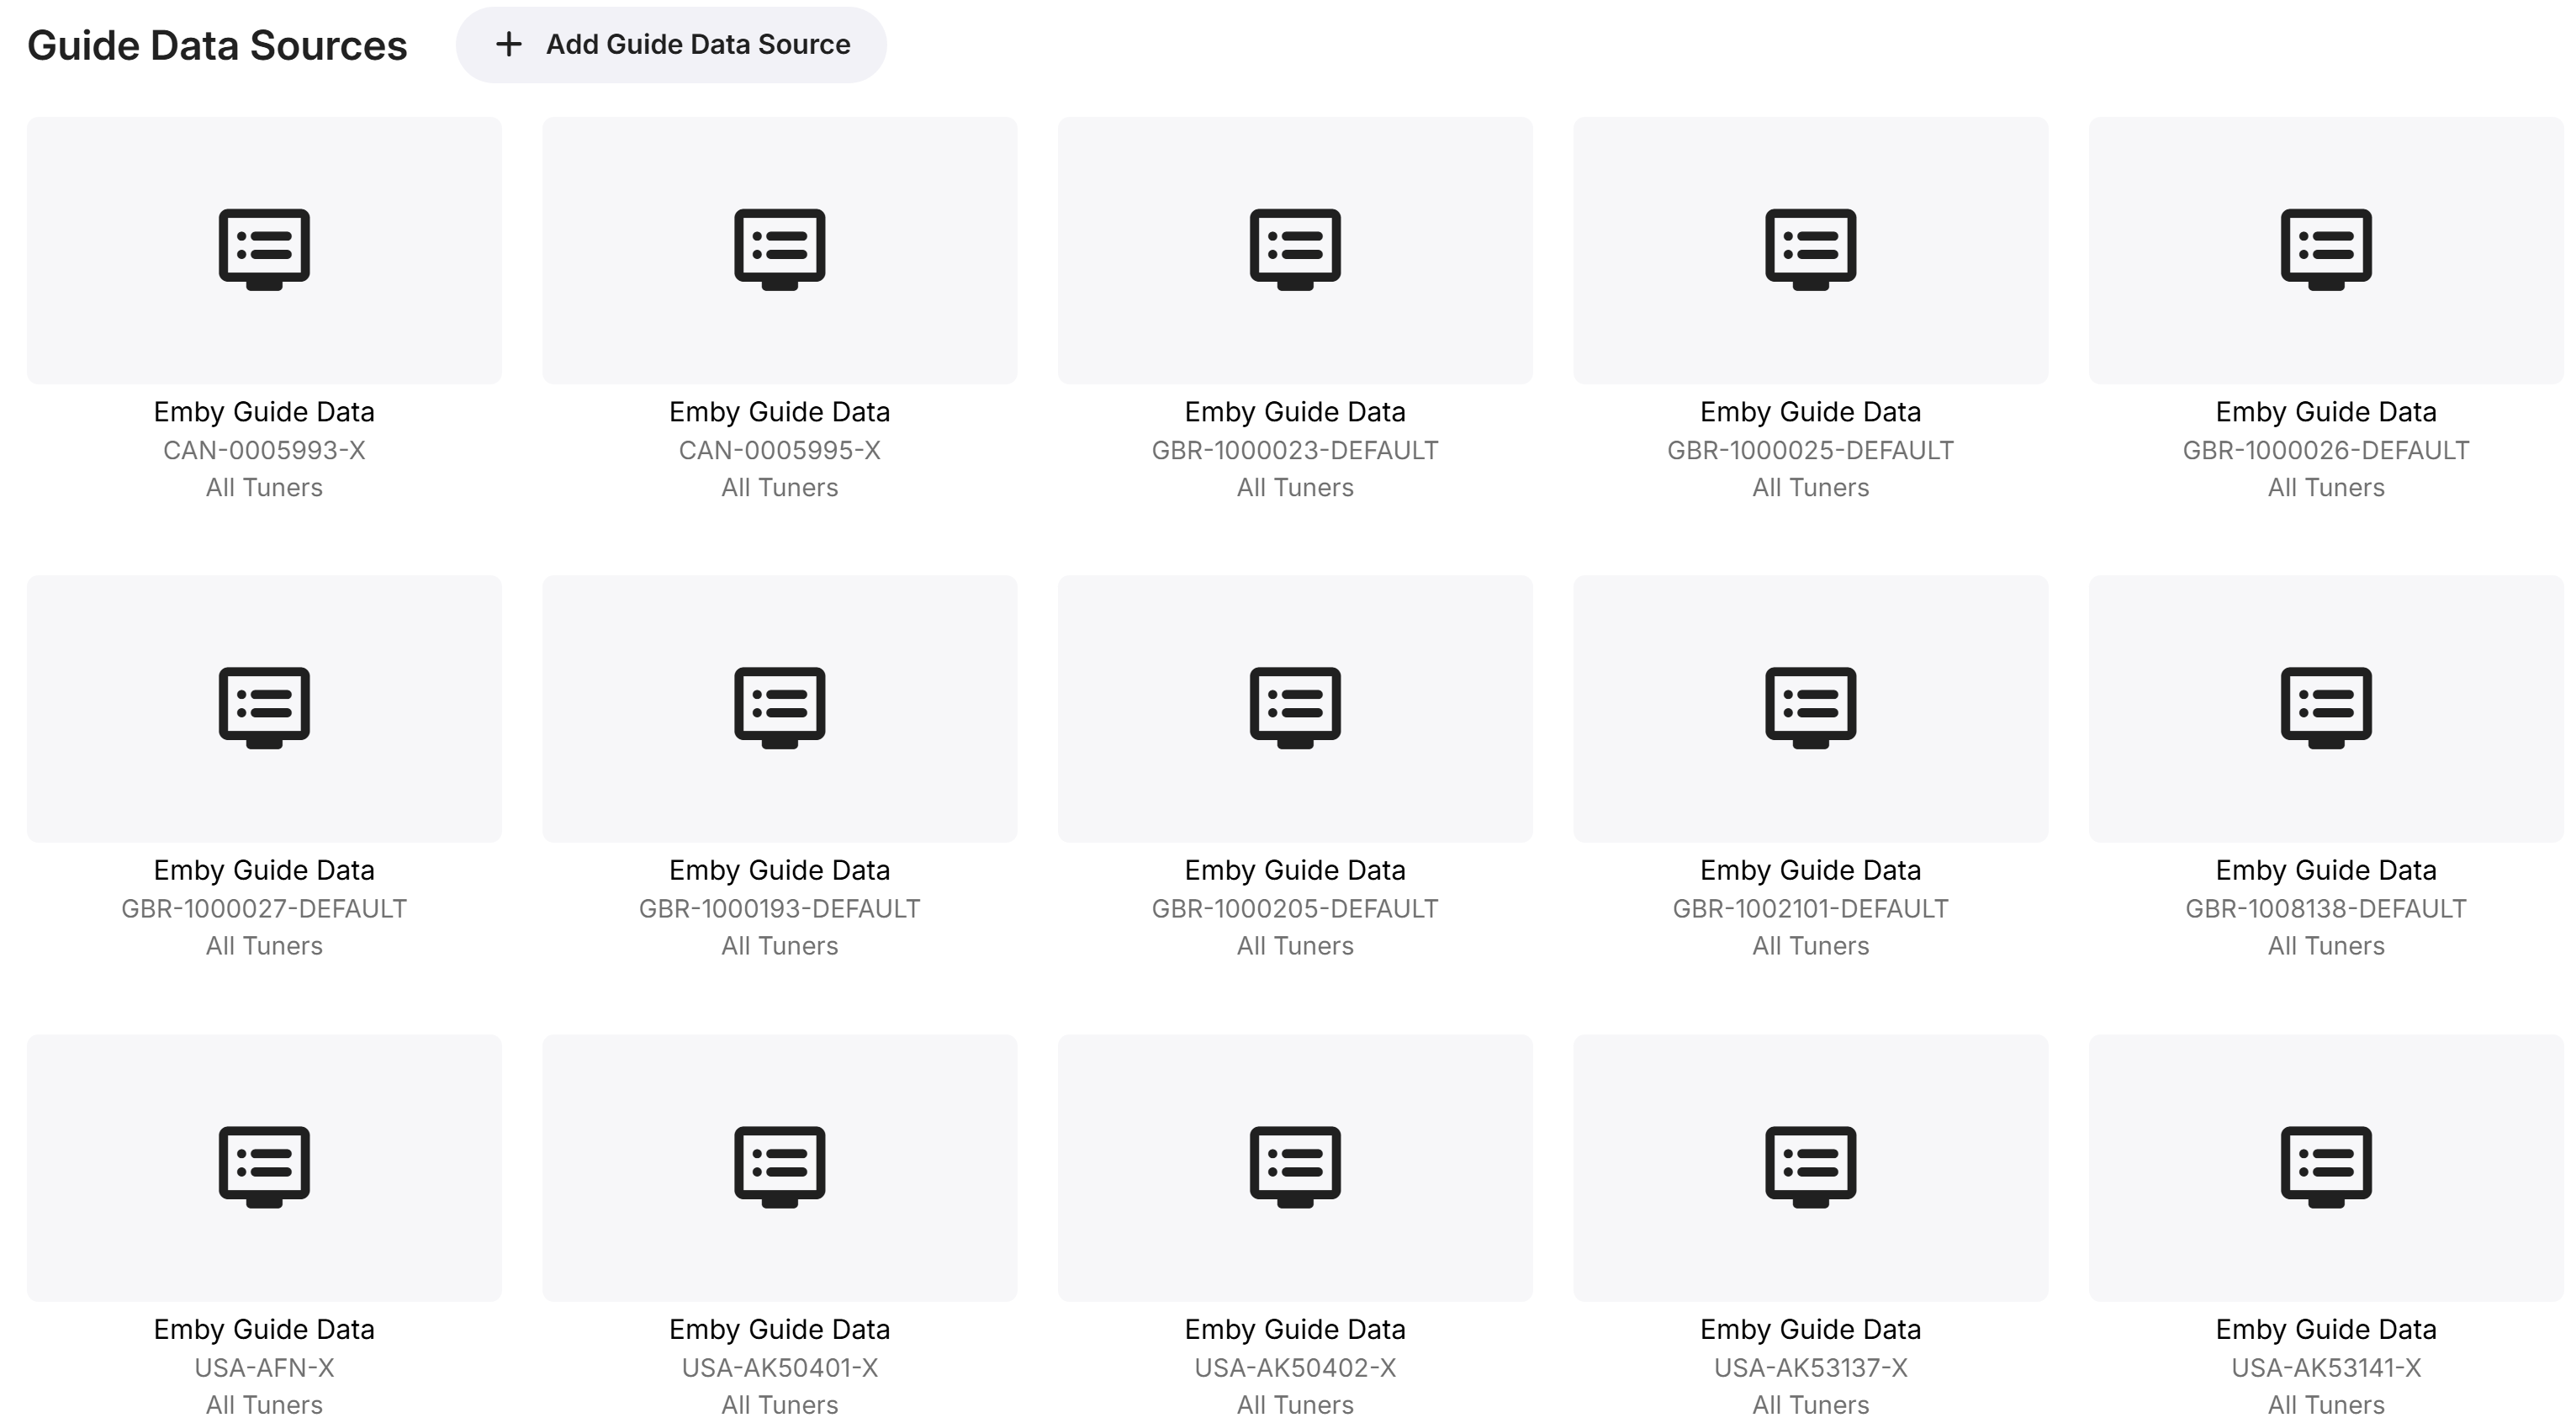
You
can go back to the Emby Live TV Setup and see the Guide Data
Providers have been added.
Then
go to Channels and see they were automatically matched.
I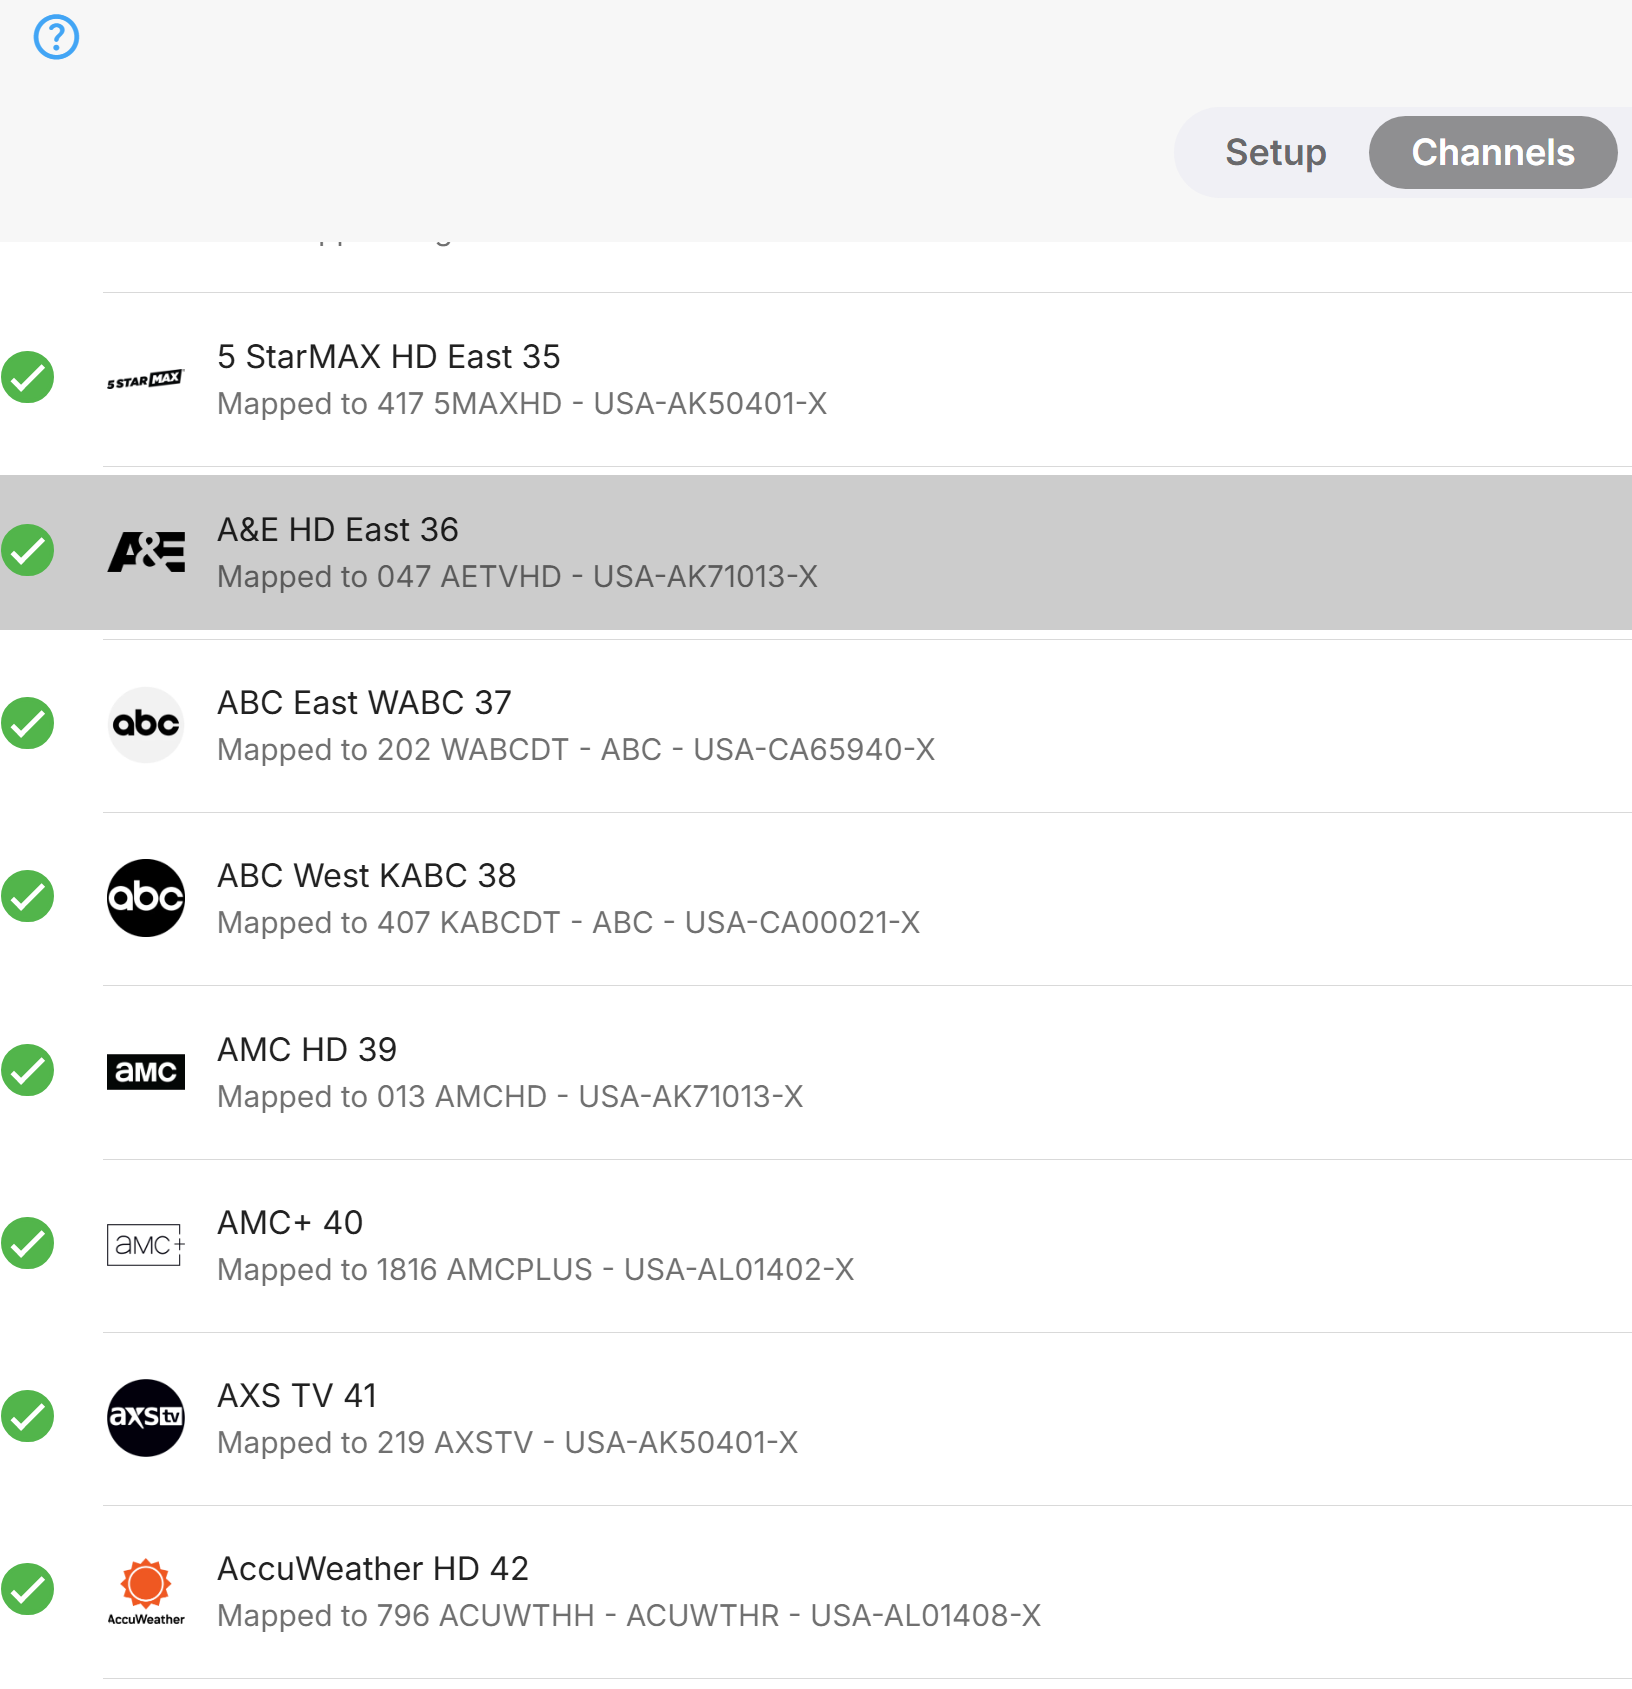
t
will take a few minutes for the guide to download and update.
Other
Settings
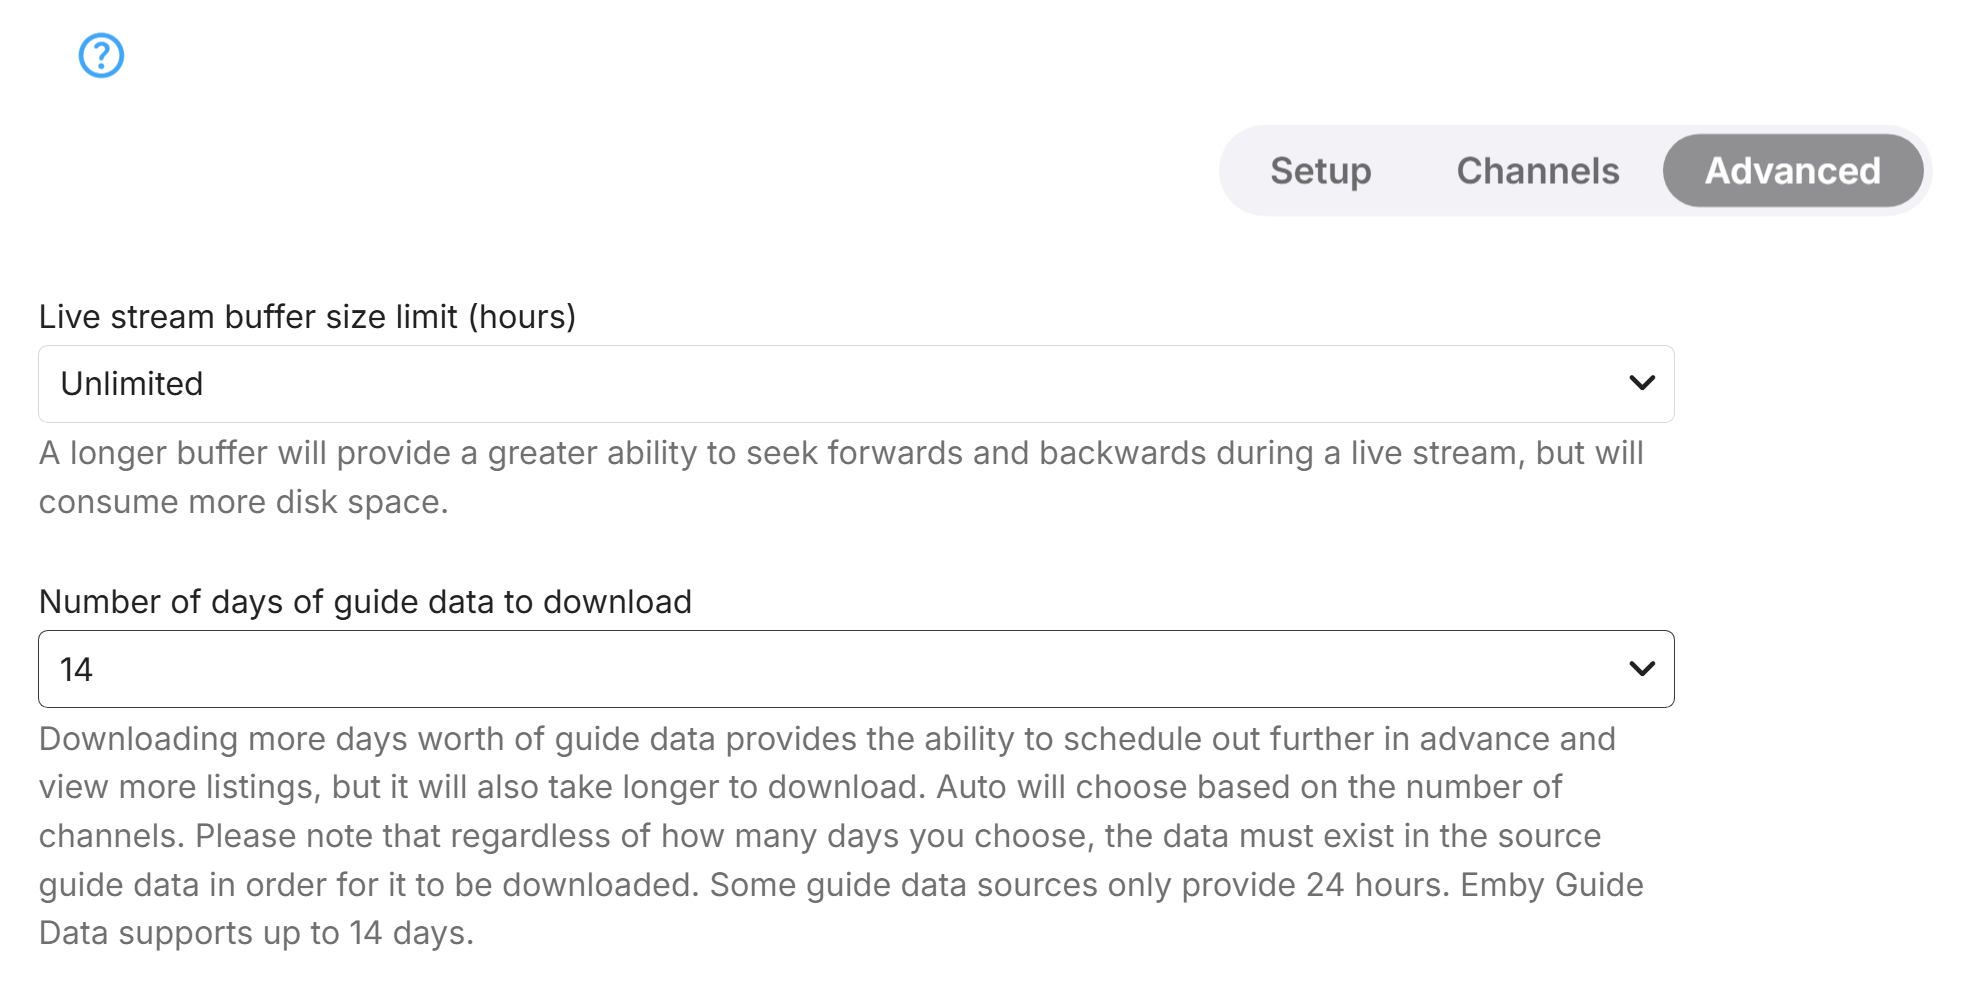
In
the Live TV Setup go to Advanced and change the days from Auto to 14
days then Save at the bottom.
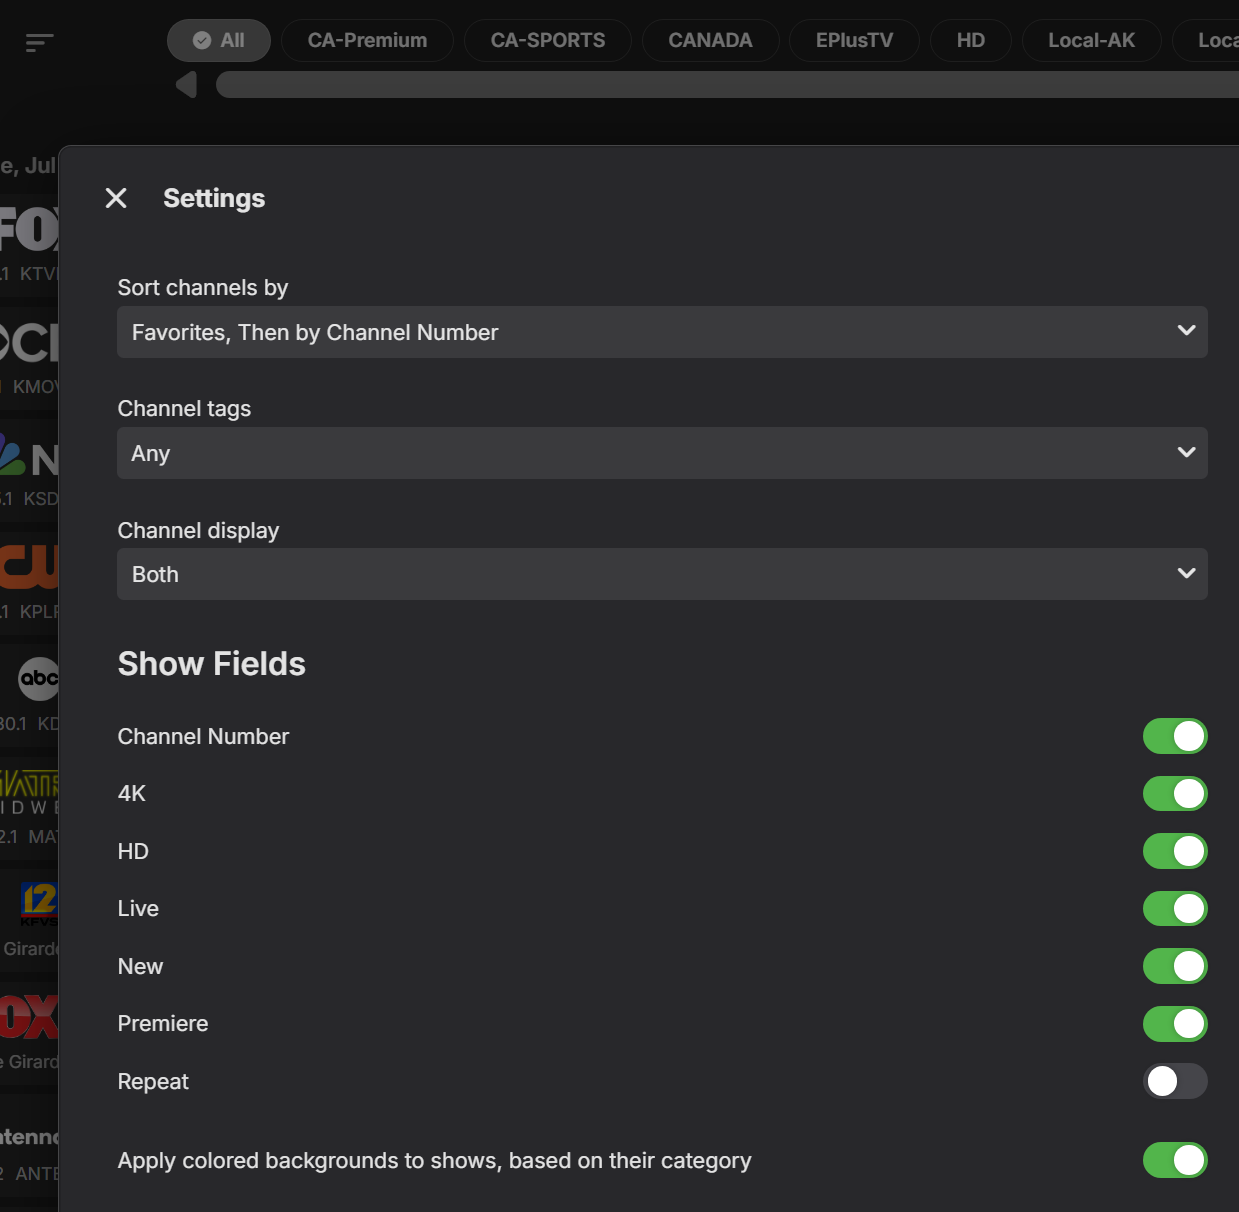
From
the Emby Guide press the three lines above the channels to get the
Menu where you can change the display order and settings such as
showing the “LIVE”, “NEW”, “PREMIERE” and/or “REPEAT”
tags and use a colored guide for News, Sports, Movies, Childrens
programs.
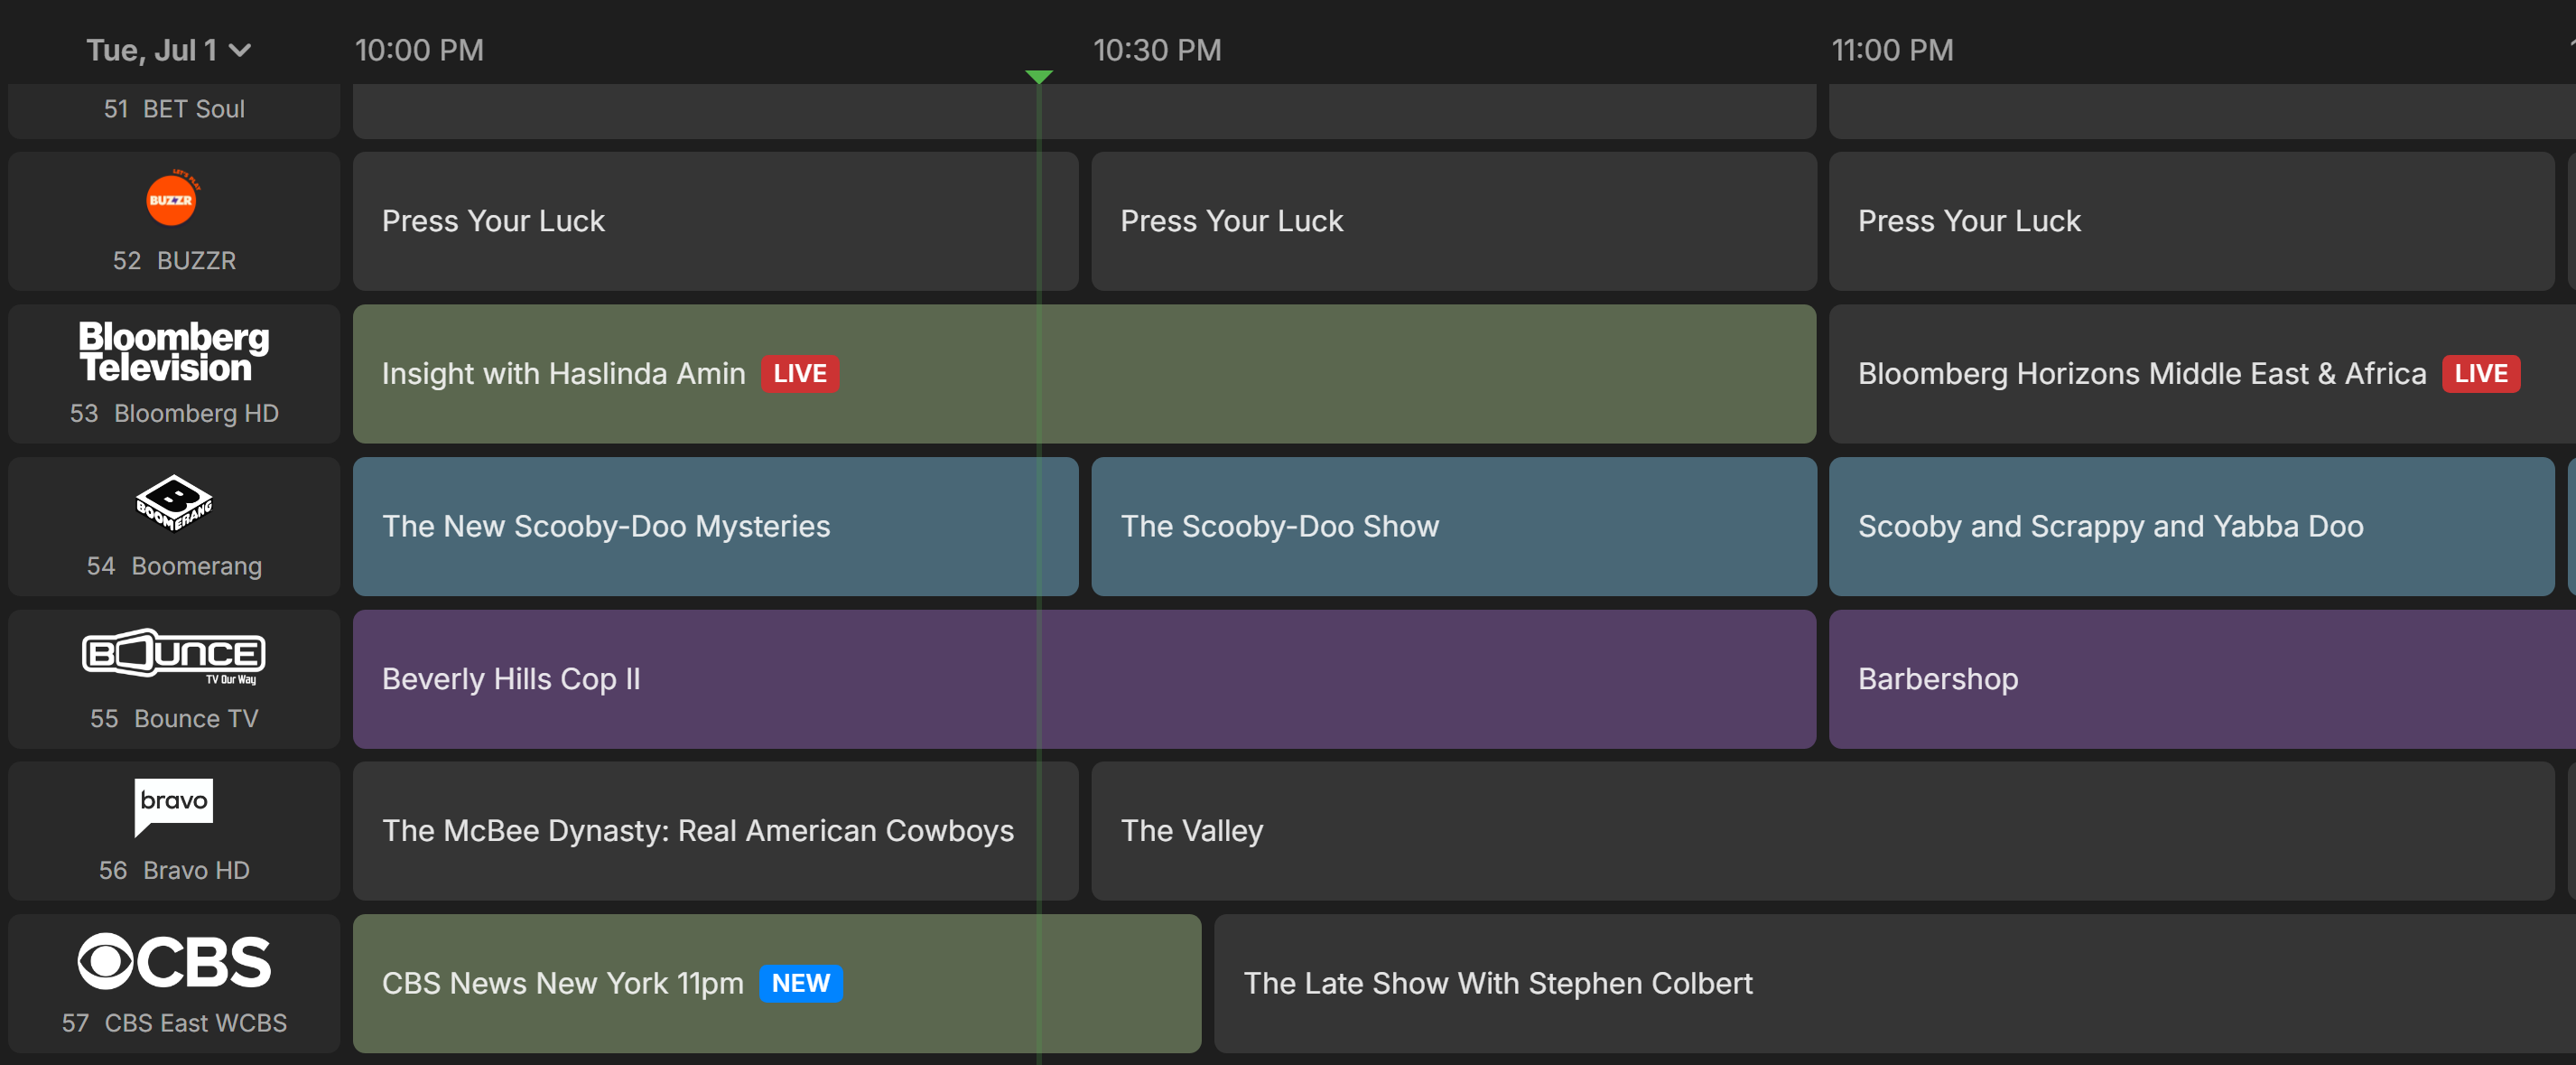
Completed
Guide Example
You
can also use the script for other Countries in Database Management.
(Channels DVR integration required to setup)
Countries Available
include:
`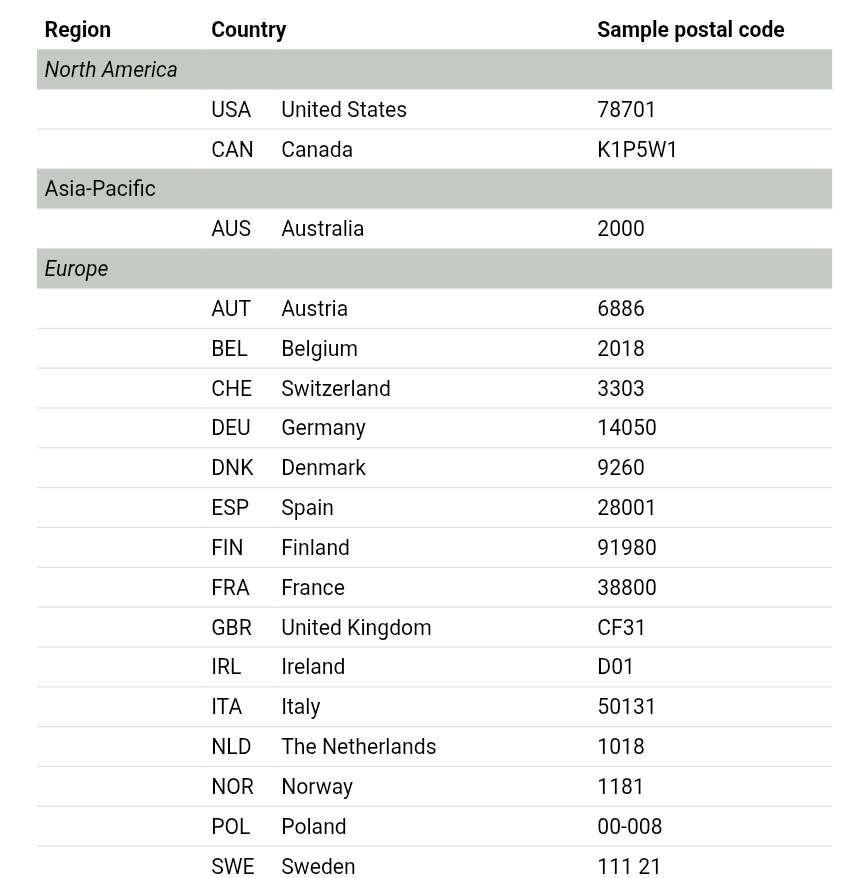
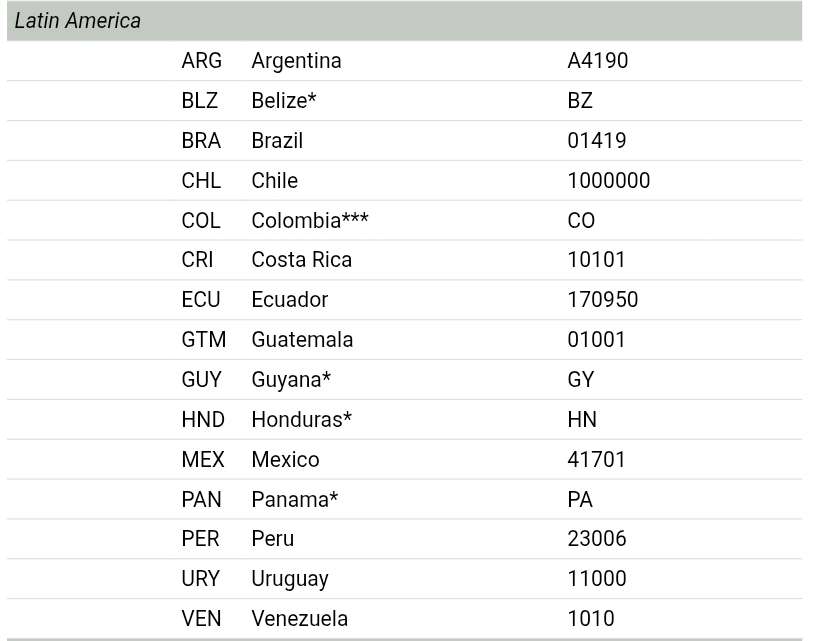
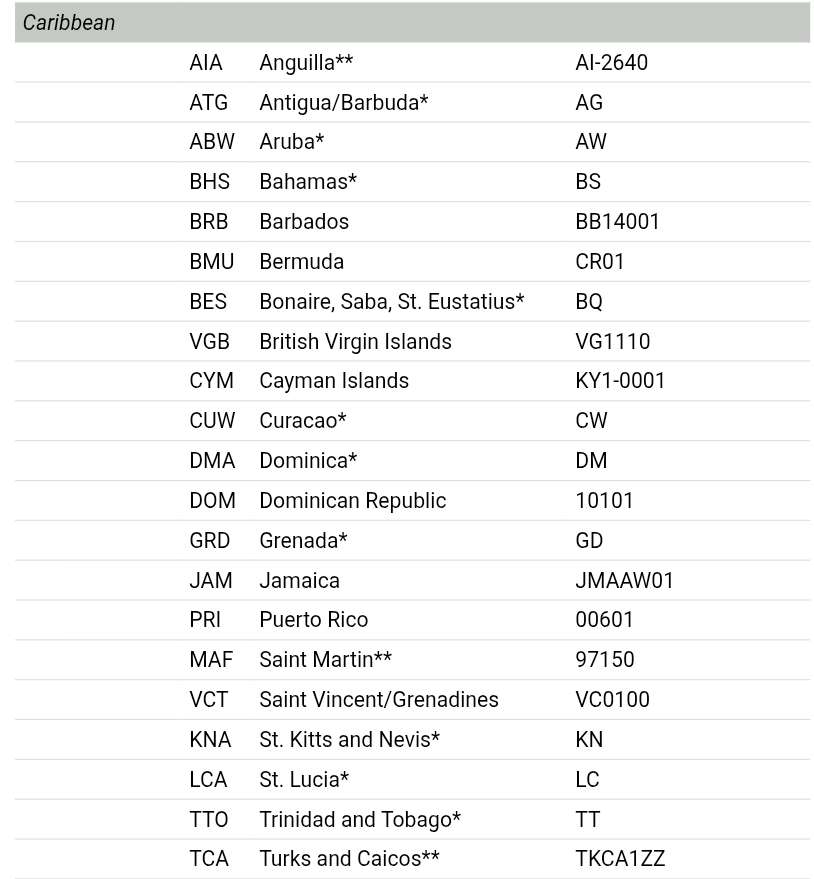
*`
Countries for which 2-letter country code is used in place of
postal code.
`**`
Countries with single valid postal code, shown here.
`***`
Colombian lineups are currently listed together under 2-letter
country code, but will be modified in near future to separate
geographic regions in Colombia using postal codes or other geographic
distinction.